Appliqué for Dummies — Written by one.


Let’s start with materials before we move on to technique. Not all of these items are necessary, but they can be helpful to make appliqué more enjoyable. (Disclaimer: some of these links are Amazon affiliates, but all are items I have purchased and use myself.)
- Needles - needle size depends on thread selection, but these applique needles were recommended to me.
- Pretty Snips - I have these embroidery scissors and love them.
- Sturdy thread- Small, tight stitches are the goal, so a thinner thread is the way to go. Aurifil 28wt - this thread is smooth and easy to use for tight, precise hand stitching in a hoop. Aurifil is carried at many quilting stores, and Hawthorne Supply Co has every color imaginable.
- Leather thimble - leather allows for more flexibility than metal or plastic thimbles.
- Appliqué glue (optional)
- Hera marker (optional)
- Freezer paper
First things first: if you’re new to quilting, you may be wondering, “What is Appliqué?”
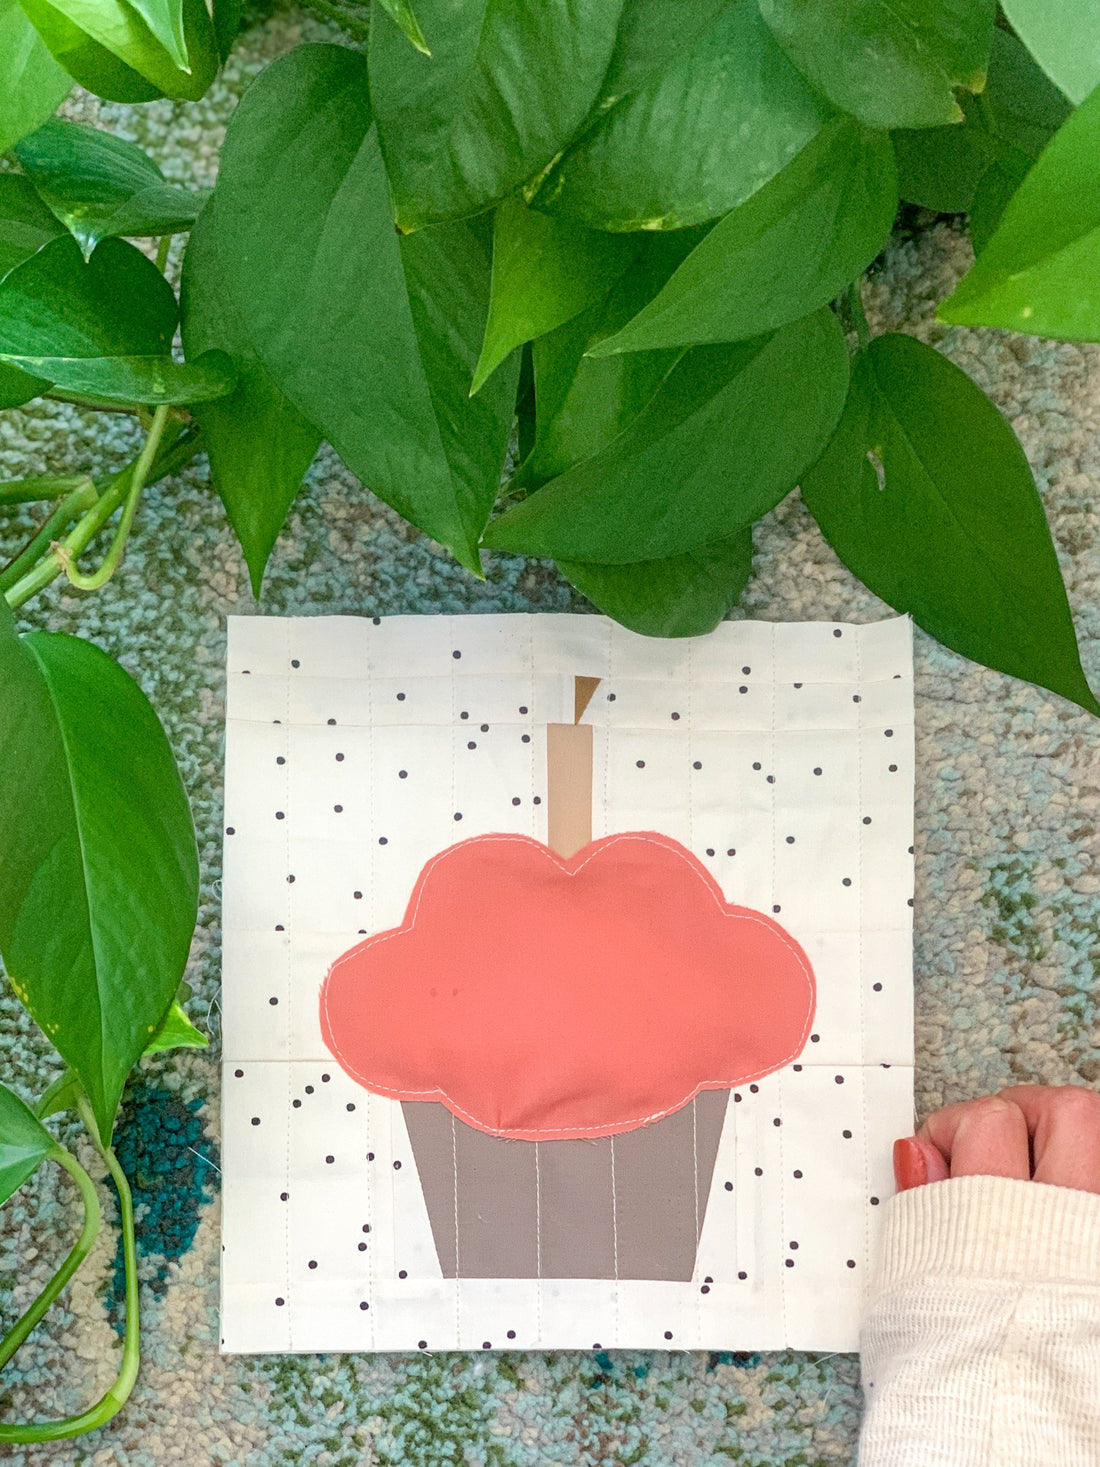
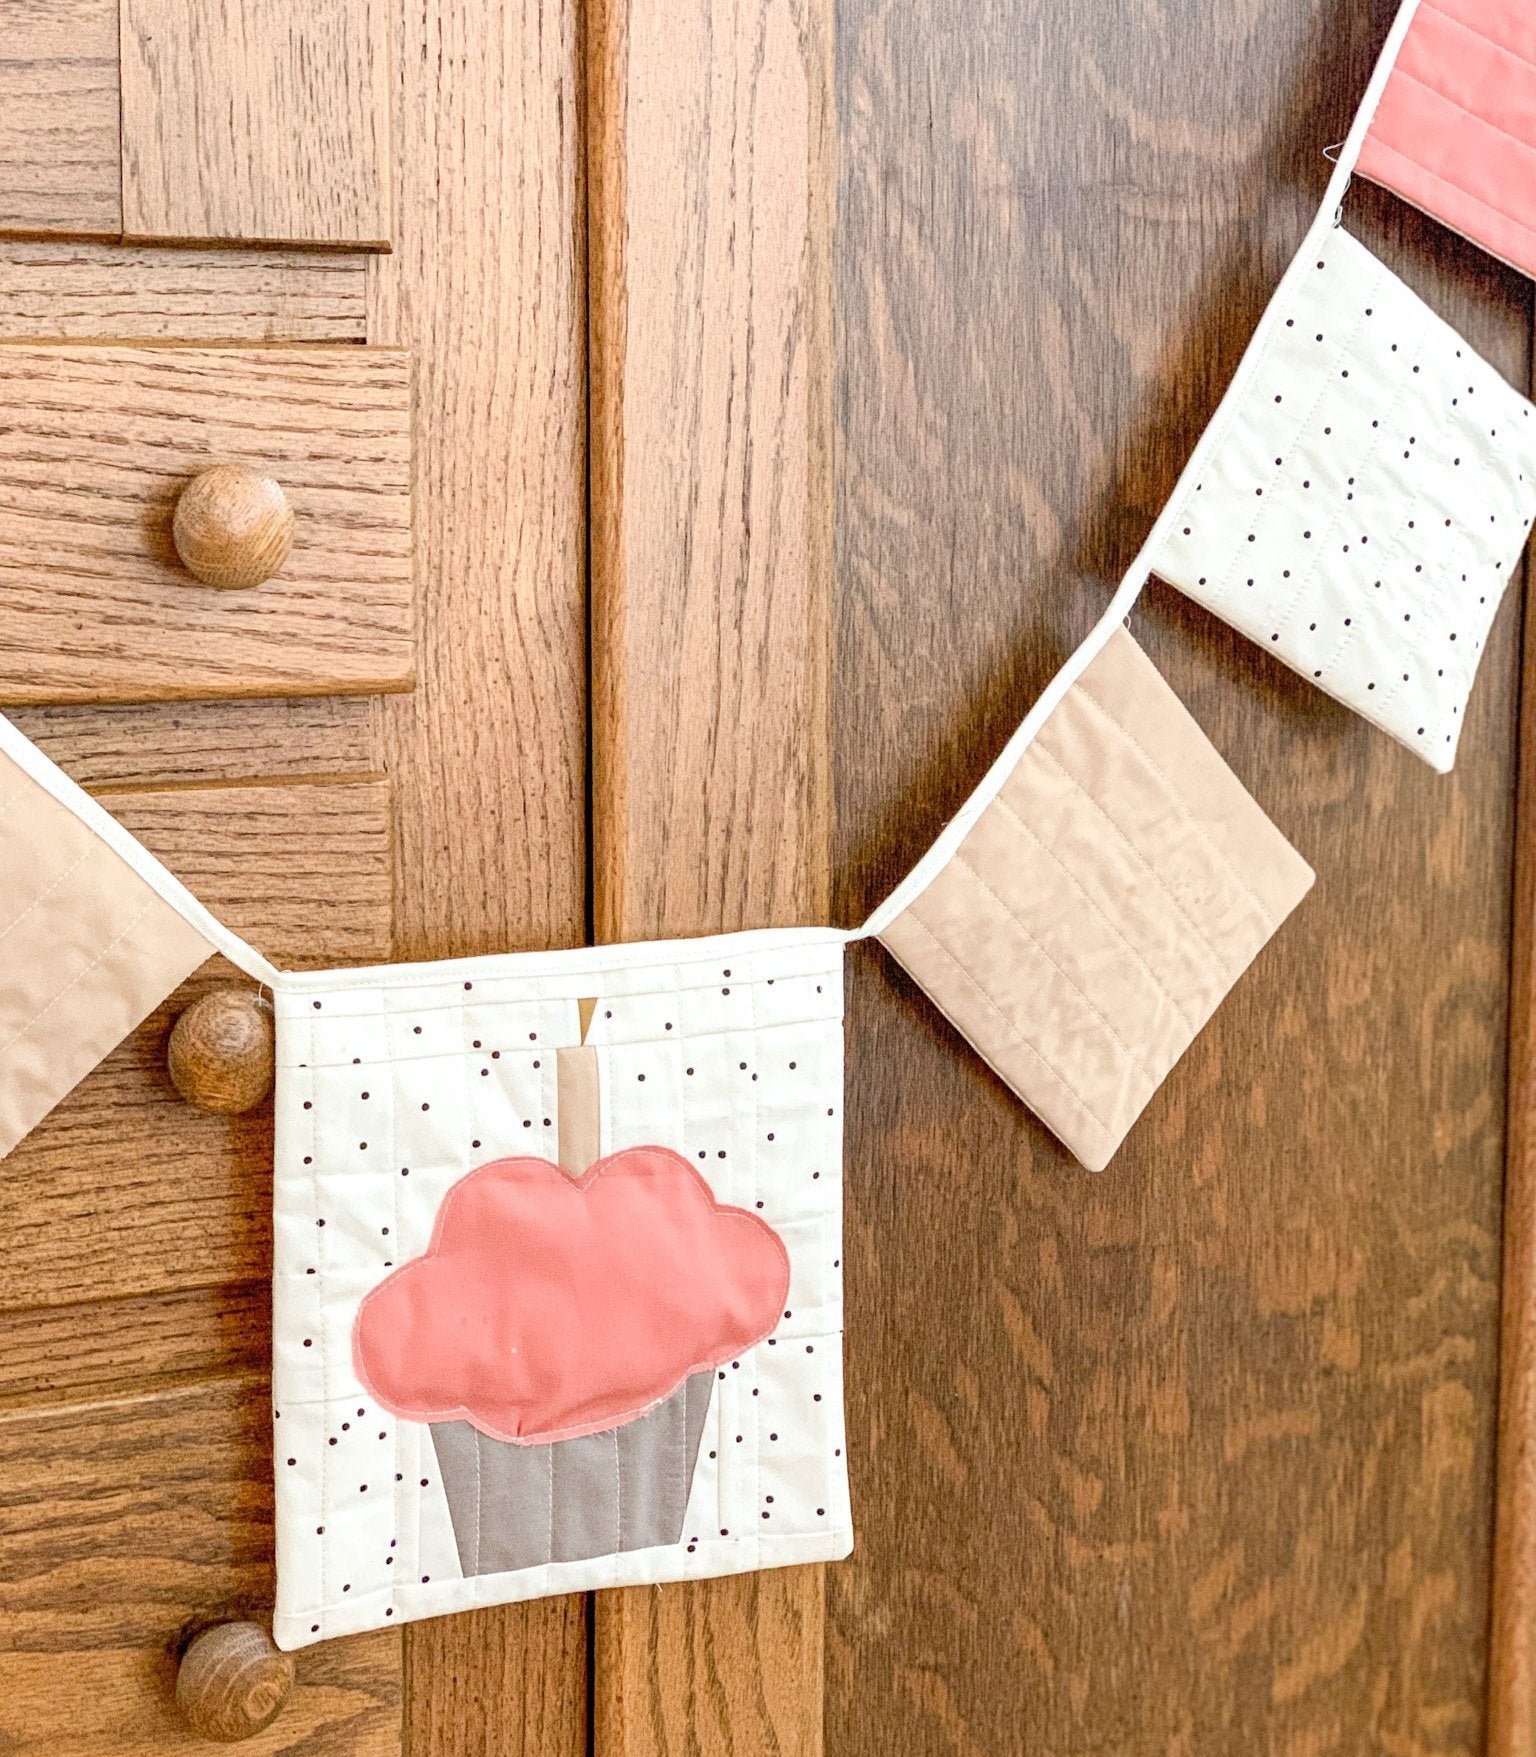
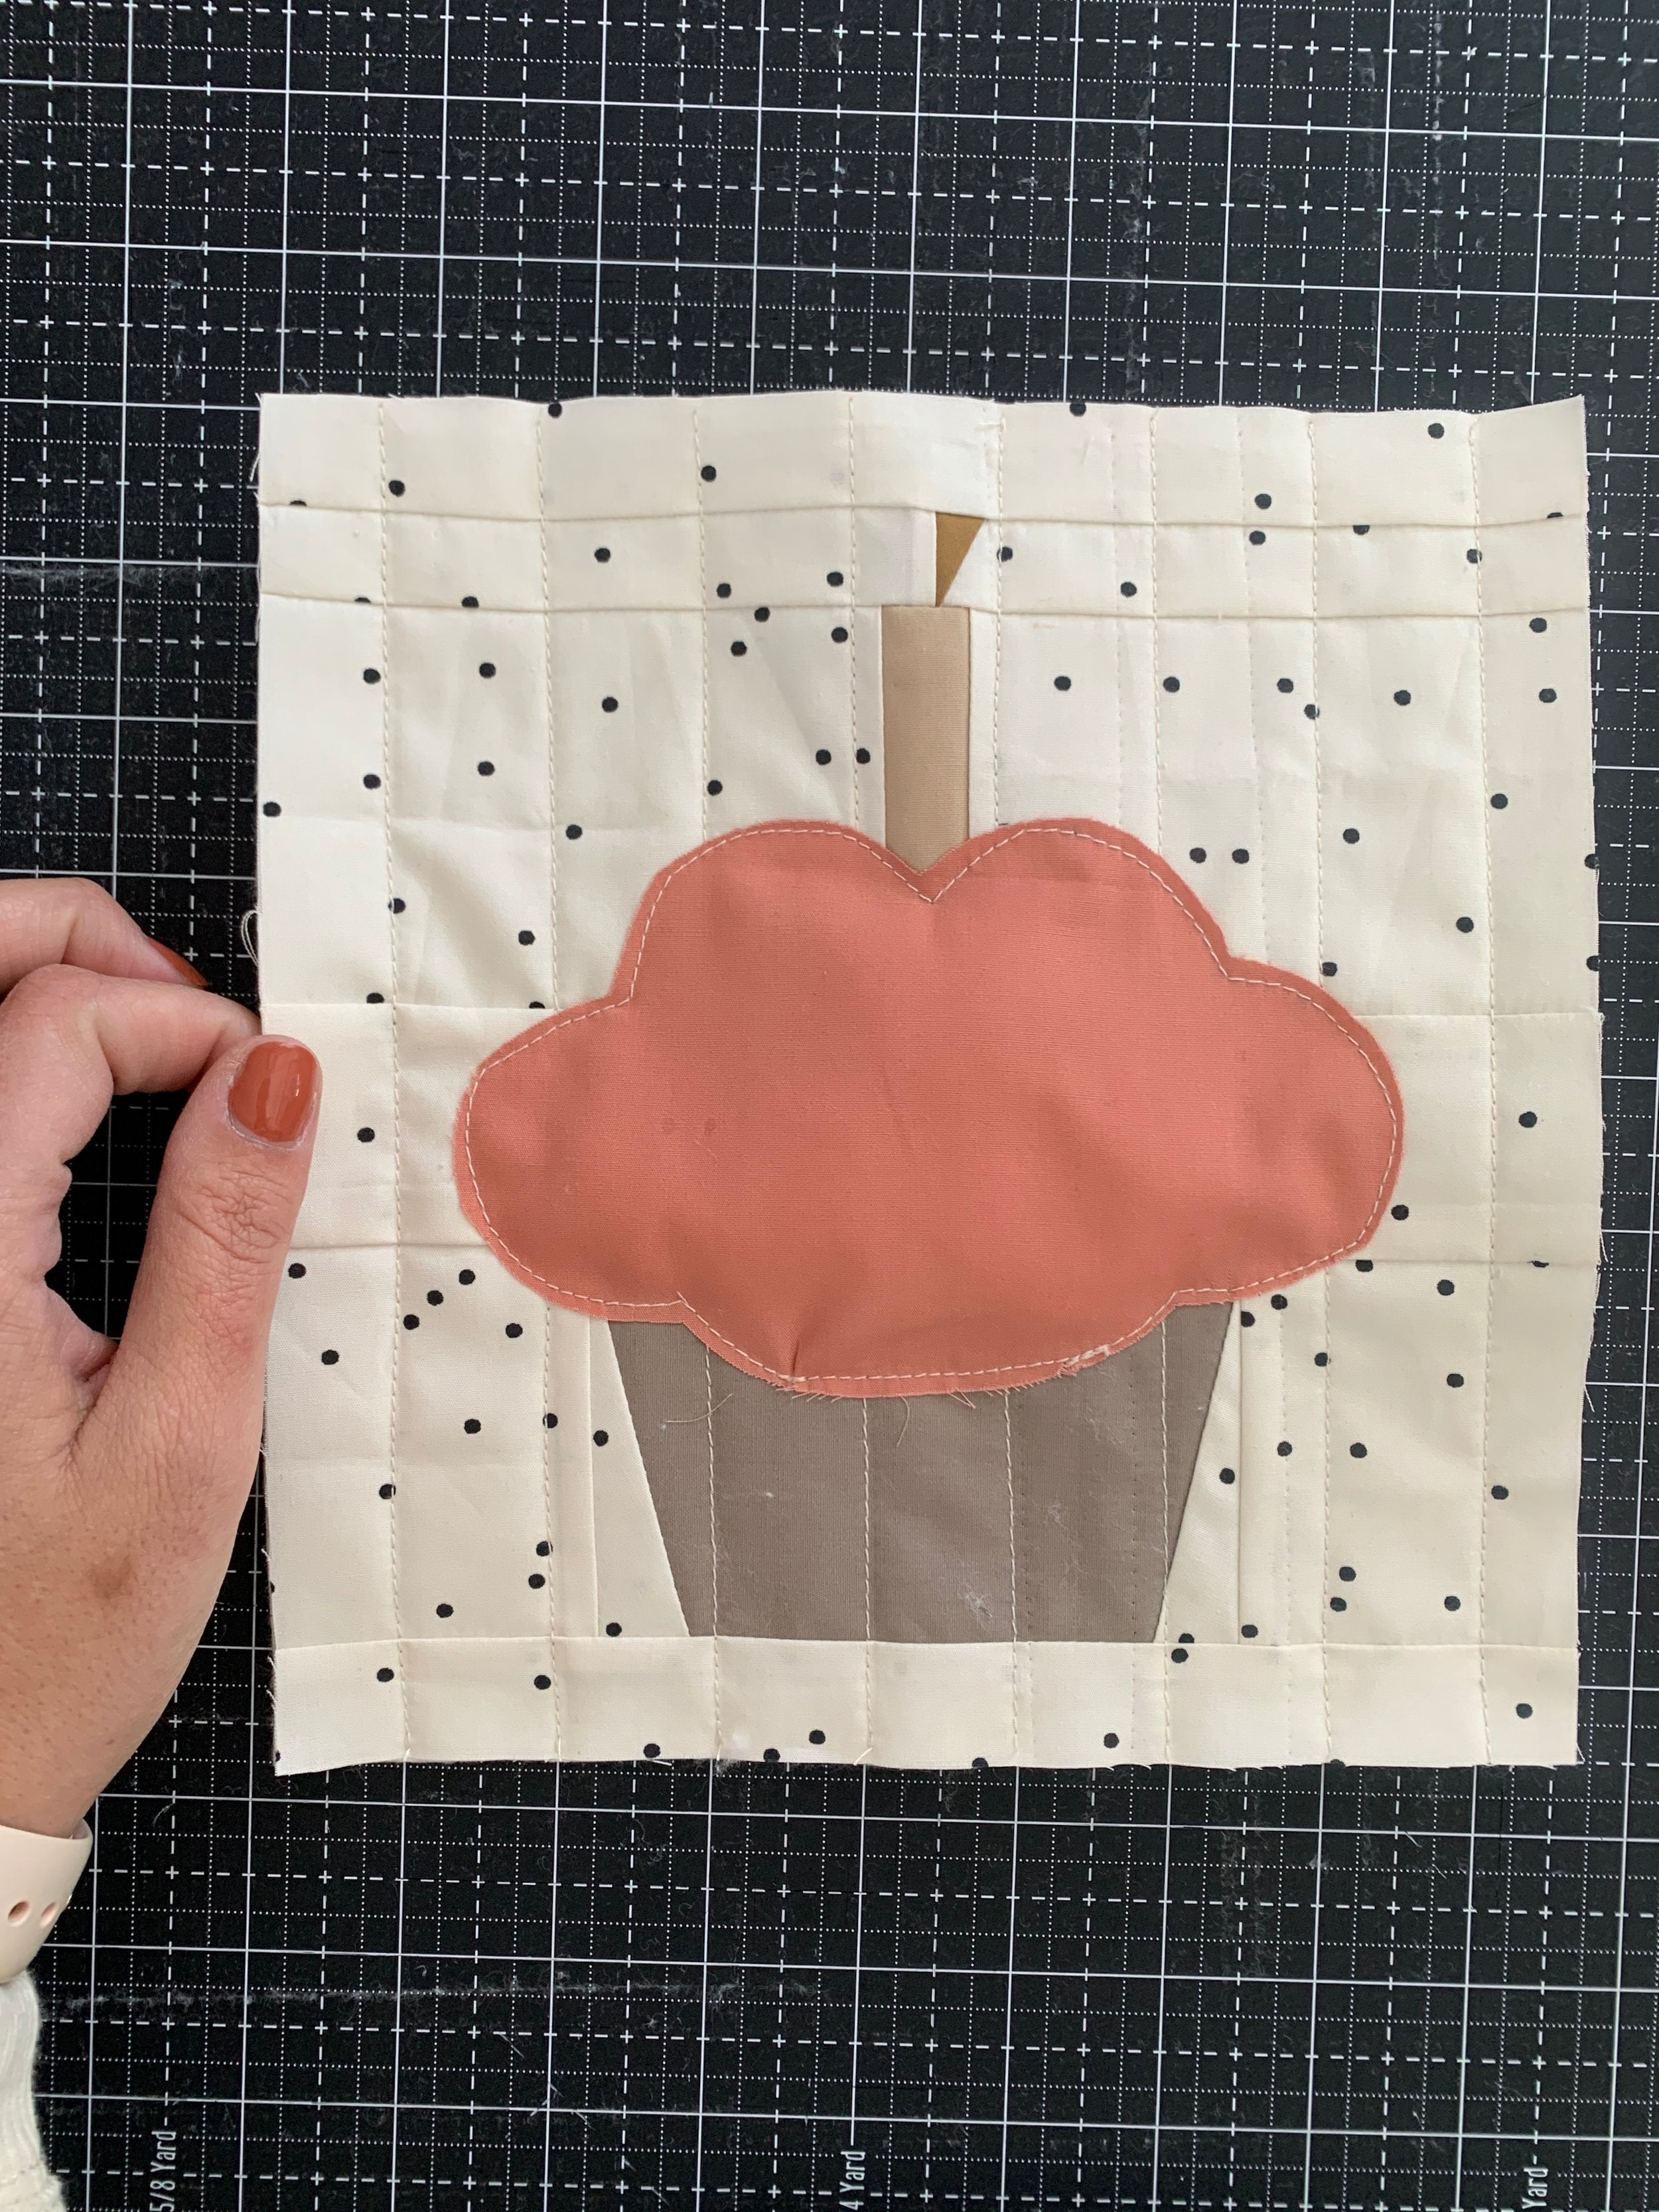
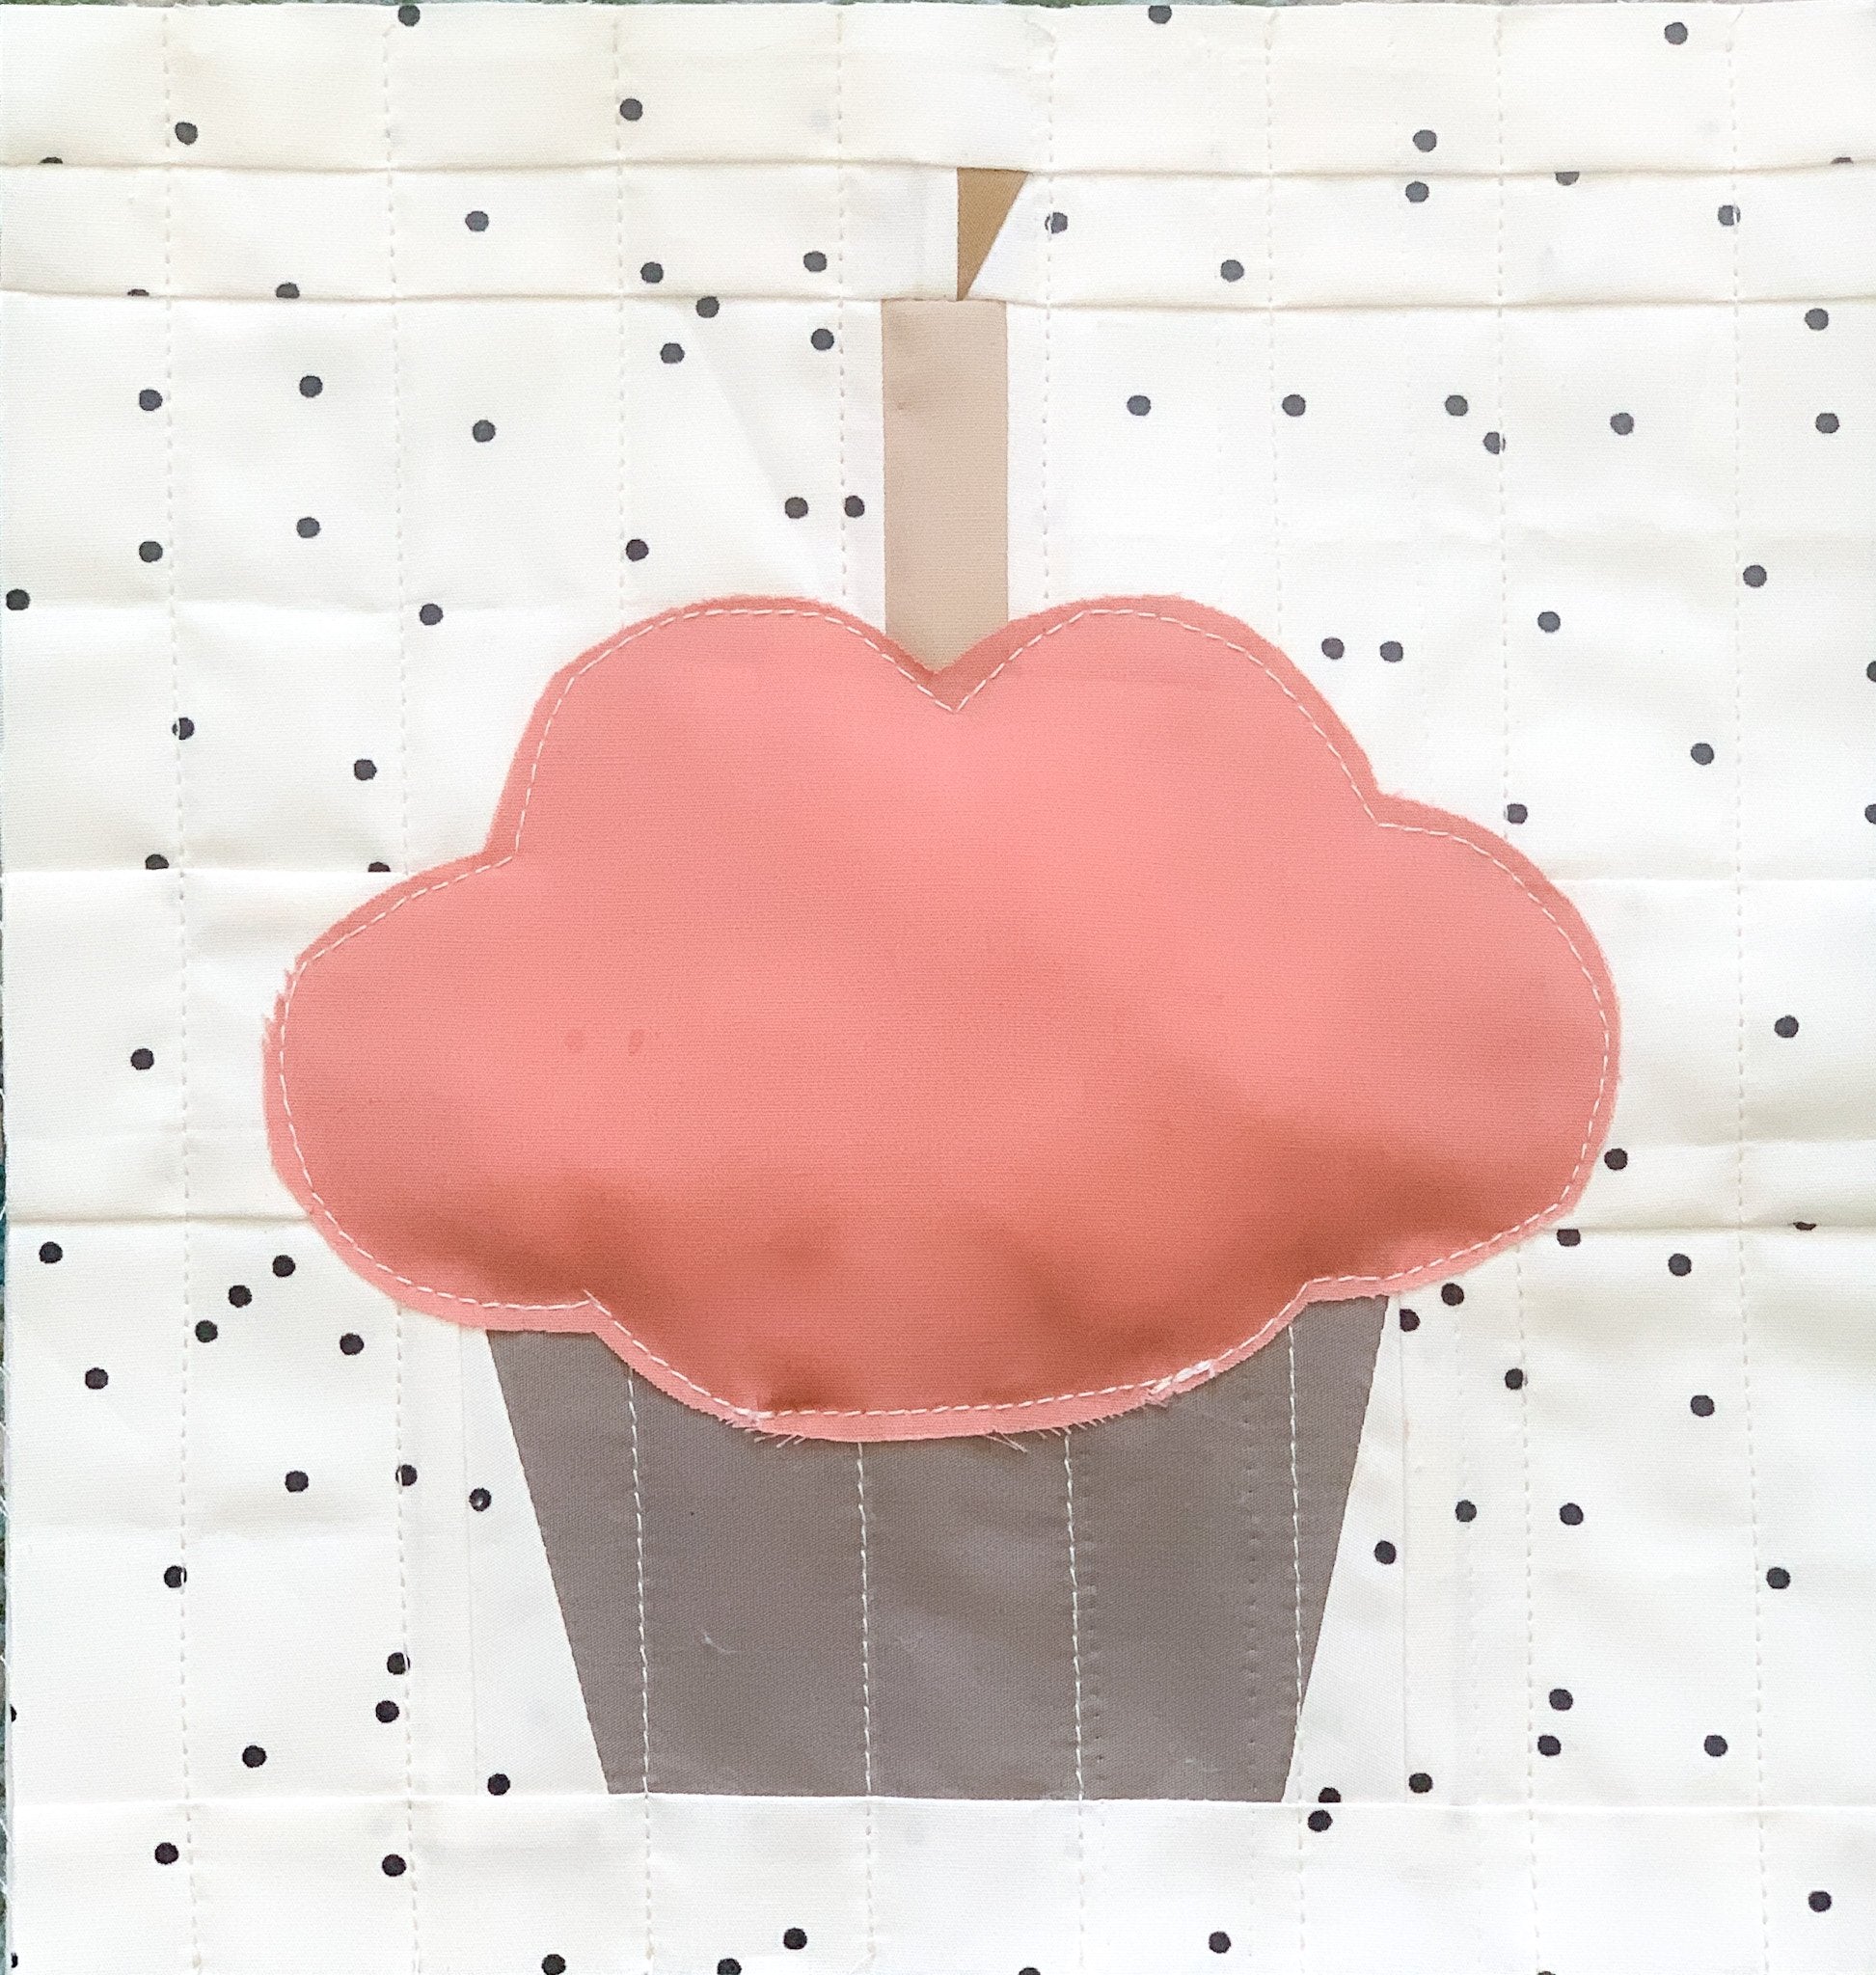
According to Dictionary.com: Appliqué is ornamental needlework in which pieces of fabric are sewn or stuck onto a large piece of fabric to form pictures or patterns. Appliqué is often used to add interest and dimension to a quilt, it can also create shapes that are not possible with traditional piecing. For example, in this Cupcake Mini Block, it would be extremely difficult to traditionally piece the top of the cupcake and even harder to create the 3D effect. That’s where appliqué comes in. In this case, after the block was pieced and quilted, the templates provided in the Cupcake Mini Block pattern were used to create the topper shape that was sewn directly onto the block and stuffed with batting to create a 3-Dimensional effect. Pretty cool, huh? If you would like to create your own version of the Quilted Birthday Banner, visit this blog post!
That sounds simple enough. But what are the different types of appliqué? At the most basic level there are 3:
- Machine appliqué
- Hand appliqué
- Fusible appliqué
This post will focus primarily on machine and hand appliqué techniques, as those are the ones that are applicable to the Cupcake Mini Block.
The differences between machine and hand appliqué are fairly straight forward — machine appliqué is done using a sewing machine, and hand appliqué is done by hand using a needle and thread. Now lets break down the subgroups:
Machine appliqué
- Raw edge — This is the technique used in the Cupcake Mini Block (pictured above), and in my opinion is the easiest. Simply place the appliqué fabric on top of the background fabric (either quilted or unquilted, depending on your preference), and slowly stitch around the outer edge of the appliqué fabric. This technique is best for creating a 3D shape, or for a piece that will experience minimal wear. It is recommended to always use a stabilizer when doing raw edge, machine appliqué but… I didn’t. However, this banner is not a highly trafficked surface, and my final product was 3D so a stabilizer was not as important in this example.
- Smooth edge — This approach prepares the appliqué fabric before sewing so the raw edges are tucked under, and the seams of finished product are smooth. There are two ways to prepare the fabric: freezer paper or appliqué glue. The freezer paper technique utilizes a paper template to fold under the fabric seam allowance around the paper template. It is a similar technique to English Paper Piecing, except the paper is removed before sewing. This blog post by Connecting Threads provides a detailed overview of the freezer paper technique. Gluing the appliqué produces the same finished look, however glue is used in place of freezer paper to secured the turned under edges of fabric.
- For both raw edge and smooth edge, a straight or decorative stitch can be utilized to secure the appliqué to the background fabric.
Hand applique:
- Smooth edge — the preparation for smooth edge hand appliqué is the same as explained above in machine appliqué. The difference comes when sewing down the fabric. Instead of utilizing a sewing machine to secure the fabric, it is stitched in place by hand using a needle and thread. The recommended needle is size 12 (like these ones).
- Needle turn appliqué achieves the same finished result as smooth edge. However, instead of preparing the fabric with freezer paper or glue ahead of time, the needle is used to turn under the


- appliqué section with each stitch. Once again, Connecting Threads has an extremely helpful video here to demonstrate this technique.
So that’s the rundown! It’s a brief overview, but the goal of this post is to give a foundation to get started on your appliqué journey. Just like any technique in quilting: it’s easier than it looks to get started, but harder than it looks to become an expert at it (at least I think so — I’ll report back if I ever become one).
Let me know what projects you plan to appliqué this month! It really does add an extra special touch to any quilt. Tag me in your projects @wellspringdesigns_co, I would love to see what you are making! And I am always happy to answer questions on Instagram or email wellspringdesignsco@gmail.com.


31 comments
I was a scam victim, I lost a lot of money up to $170,000 I would like to express my gratitude to Innovations recovery Analyst for their exceptional assistance in recovering my funds from a forex broker. Their expertise and professionalism in navigating the complex process were truly commendable. Through their guidance and relentless efforts, I was able to successfully recover my funds of $170,000, providing me with much-needed relief. I highly recommend them on – INNOVATIONSANALYST@ GMAIL. COM or WhatsApp + 1 424 285 0682 to anyone facing similar challenges, as their dedication and commitment to helping clients are truly impressive. Grateful for their invaluable support in resolving this matter.
buy fake us dollar notes ( WHATSAPP : +1(725) 867-9567 ) Buy fake dollar notes, Buy a fake dollar, Buy a fake 5 dollar bill, Buy us dollar fake notes, dollar bill fake, Buy ebay fake money, Buy ebay fake money that looks real, Buy ebay fake tracking number usps,buy f dollar bill Buy g notes money, buy genuine us currency, buy us notes for sale, how to know fake us dollar, buy fake us money, buy fake notes in usa, buy fake us notes, buy bucks dollar general, buy x notes currency, buy fake dollar bills, Buy fake $5 dollar bill, dollar bill for sale, dollar bill for sale, buy fake notes usa https://buyrealcurrency.com/
Telegram : https://t.me/buy_real_and_fake_passport
Buy fake USD $ ( WHATSAPP : +1(725) 867-9567 ) Buy fake us dollars, Buy Fake Canadian Dollars ( CAD ), Buy counterfeit USD , Order fake USD , Buy US Dollar Bills , Buy Prop Money , Buy Fake Euros , Buy fake Australian dollars , Buy Fake Money , Buy Counterfeit Money, Buy fake US dollars ( WHATSAPP : +1(740)280-2019 ) Buy fake counterfeit us bills, buy fake Canadian dollars (CAD), Buy fake usd/aud/cad/CNY/GBP/euros/pounds/RMB/HK$/dollars, Buy 100% undetected counterfeit money, Buy clone cards, Buy fake Chinese yuan, Buy fake euros, Buy Fake Dollars Online, Buy Fake Money Online USA – Undetectable $100 Bills, Order Counterfeit Money, Buy Counterfeit US Dollar Notes, Best counterfeit money for sale, Buy fake United States Dollar, Buy Counterfeit US DOLLAR-USD, Buy 100% Undetectable Counterfeit Money, Buy Fake US Dollar Notes – Undetectable Bills for Sale,
Buy Fake US dollars USD Online (WHATSAPP : +1(740)280-2019) buy fake Chinese Yuan RMB online, buy fake Chinese Yuan online, Buy fake US bills, Buy fake counterfeit us bills, buy fake Canadian dollars (CAD), Buy fake usd/aud/cad/CNY/GBP/euros/ Telegram : https://t.me/buy_real_and_fake_passport
We are specialize in offering a vast array of replicas, including fake US dollars (usd), counterfeit Canadian dollars (CAD), replica Chinese yuan (CNY) and cloned credit cards, euros, pounds sterling and Australian dollars (aud). Our products are meticulously crafted to be virtually indistinguishable from their genuine counterparts. visit our website https://www.counterfeitdocsforsale.com/buy-undetectable-counterfeit-money/ for a confidential consultation and explore a world of possibilities.
For more information:
WHATSAPP : +1(740)280-2019
WeChat ID : Scottbowers44
https://www.counterfeitdocsforsale.com/buy-undetectable-counterfeit-money/
https://buyrealcurrency.com/product/buy-fake-us-dollars/
https://buyrealcurrency.com/product/buy-fake-counterfeit-us-bills/
https://buyrealcurrency.com/product/buy-fake-usd-online/
(WHATSAPP: +1 (725) 867-9567) Where Can I Order UK Registered Drivers License Without Test or Exam
Do you want a Real UK Drivers License without taking any Driving test or exam ? Just contact Us now because we producers of Valid and legal UK drivers license. (WHATSAPP: +1 (725) 867-9567)
Telegram : https://t.me/buy_real_and_fake_passport
https://www.counterfeitdocsforsale.com/buy-uk-drivers-license-online/
Get your UK driving license done with us ?? 3 to 4 business working days.
•DVLA APPROVED ??
•Residence Permit ?? (WHATSAPP: +1 (725) 867-9567)
•ID Card??
•Provisional license ??
•Theory certificate ??
•Practical certificate ?? (WHATSAPP: +1 (725) 867-9567)
•Motorcycle License ??
°CSCS ? ??
•Full license ??
•Band and point removal message
(WHATSAPP: +1 (725) 867-9567)
buy fake id card
Buy original quality real ID card Uk online. London, Manchester, New Castle id and some others States IDs available. Valid for 5-10 years. UK citizens use a National ID card as a form of identification in the United Kingdom. ID cards in the UK are issued to residents who are 18 years or older and are used for identification purposes. UK citizens are normally required to obtain areal id card from their State of residence and all states recognize each other’s ids for non-resident age requirements.
Are you in need of a real ID Card UK, visit our website order page and place your order.
fake drivers license and identifications for sale in usk a fake drivers license number us fake driver license Wisconsin fake id vs real fake us driver license number
21 fake id zsk usa ny fake id
fake drivers license id UK us fake driving license a fake identity quick fake ids #Fakedocuments #fakeidcard #drivinglicense #passport fake drivers license identify fake id
using fake UK ID
“Buy German driver’s license without exams” (WHATSAPP: +1 (725) 867-9567)
“Buy UK driving license online”
“Buy Switzerland driver’s license online”
“Buy Category B driver’s license in Austria”
“Romanian driver’s license Price Online”
“Purchase Hungarian driver’s license in 3 days” (WHATSAPP: +1 (725) 867-9567)
“Buy Polish Drivers license”
“Buy Netherlands driver’s license”
“Buy Portuguese driver’s license”
“Buy EU drivers license”
“Buy Russian driver’s license”
“Purchase Spanish driver’s license”
“Apply for Italian driver’s license”
“Registered Swedish divers license” (WHATSAPP: +1 (725) 867-9567)
“Buy French driver’s license online”
“Buy Real Belgian driver’s license”
“Buy CSDD registered driver’s license in Latvia”
“Canadian driver’s license without exams”
“Buy US driver’s license in 5 days”
“Buy Czech Republic driver’s license”
“Buy registered Greece driver’s license”
“Purchase a Danish driver’s license online”
“Get a Norwegian driver’s license in 3 days” (WHATSAPP: +1 (725) 867-9567)
“Registered Irish driver’s license for sale”
“Buy a German residence permits online”
“Get real UK residence permit in 3 days”
“Buy a Spanish Residence Permit online”
“Buy EU residence permits”
“Buy a Belgian residence permit”
“Get real residence permit in Italy” (WHATSAPP: +1 (725) 867-9567)
“Buy MPU validation”
“Buy Netherland passport”
“Buy EU passports”
“Buy German passports online”
“Buy UK passports”
“Buy US passports”
“Netherland residence card”
“Buy registered Swedish residence card”
“Buy Real fake Identity cards”
“Get Visa assistance online”
“Buy Austrian passport online”
“Real Italian passports for sale”
“Buy Portuguese passport”
buy real and registered identity card
buy car and register in different state
buy-n-sell real estate
how to buy and register a used car
2 buy or sell realty
Buy UK , USA, SWITZERLAND passport
UK ,USA,SWITZERLAND…Driver’s license (WHATSAPP: +1 (725) 867-9567)
Buy UK ,USA,SWITZERLAND….Driver’s license
UK ,USA,SWITZERLAND…Birth certificate
UK ,USA,SWITZERLAND..ID Card
Buy Real School Certificate
Buy Fake School Certificate
Buy Documents Online
Buy Other Documents
Buy Resident Permits
Social Security Number (SSN)
IELTS, TOEFEL & ESOL
Buy Certificates And Diplomatic Documents
(WHATSAPP: +1 (725) 867-9567)
buy registered drivers license online high grade Quality"
“how to get a fake drivers license that works”
“real driving license”
“free fake driving license UK
“fake UK driving license”
“fake driving license online”
“fake UK driving license DVLA”
“fake driving license online”
“buy a real driving license UK”
“how to spot a fake driving license UK”
“fake id UK driving license”
“free fake driving license UK”
“buy genuine driving license UK”
“how to get a fake drivers license that works”
“fake UK driving license template”
“fake driving license generator -UK”
Telegram: +1 (725) 867-9567
Email: authenticnotes5@gmail.com
(Telegram: Zhaochen44)
WeChat: Scottbowers44
https://counterfeitdocsforsale.com/product-category/buy-drivers-license/
https://www.counterfeitdocsforsale.com/buy-uk-drivers-license-online/
Buy UK drivers license ( WHATSAPP : +1(740)280-2019) Buy real and fake drivers license, Buy Singapore drivers license Online, Buy Chinese drivers license, Buy USA drivers license, Buy Canadian drivers license, buy japan drivers license, buy south Korea drivers license (Telegram: Zhaochen44) Buy German drivers license, Buy Australian drivers license
buy drivers license online can you buy drivers license, where can i buy drivers license, how much does it cost to buy drivers license, can u buy drivers license, can you buy drivers license in Thailand, buy drivers license online Telegram: +1 (725) 867-9567
Telegram : https://t.me/buy_real_and_fake_passport
https://www.counterfeitdocsforsale.com/buy-uk-drivers-license-online/
buy drivers license South Africa, buy drivers license UK WHATSAPP : +1(740)280-2019 buy drivers license Germany, can you buy drivers license online, get drivers license Arizona, get drivers license appointment, get drivers license Alabama, get drivers license Arkansas, get drivers license Australia, get drivers license Alberta, how to get driver’s license at 18, get drivers license as adult, get drivers license at 17, get drivers license at dmv, buy an international drivers license, can you buy a drivers license, do I need a driver’s license to buy a car, buy a drivers license, buy a drivers license online, ( WHATSAPP +1 (725) 867-9567 ) how much does it cost to buy a drivers license, buy a new driver’s license, get drivers license back after suspension, get drivers license back after dui, get drivers license back, get drivers license bc Telegram: +1 (725) 867-9567
https://www.counterfeitdocsforsale.com/category/buy-drivers-license-online/
how to get a driver’s license in boston, how to get driver’s license in bali, can i buy a driver’s license, can you buy driving license, can you buy a drivers license online, buy drivers license, buy drivers license Brampton
can i buy beer with expired driver’s license, do you need a driver’s license to buy a boat (Telegram: Zhaochen44) can you buy beer with a temporary driver’s license, where to buy drivers license book, do you need a driver’s license to buy a bike, how to get a Colorado driver’s license, get drivers license Chicago, how to get a California driver’s license, get drivers license ct, get check code driver’s license, get drivers license card, how to get a copy of driver’s license, how to get a driver’s license in Canada, get drivers permit California, how to get a driver’s permit in Colorado, can i buy drivers license, do you need a driver’s license to buy a car, buy car insurance without drivers license, get license for drone, buy driver’s license online, buy driver license, buy drivers license online USA, do you need a driver’s license to buy a gun, get your electrical license, buy eu drivers license, get drivers license Florida
get drivers license fast, get drivers license Florida online, get drivers license free, get drivers license first time, get drivers license faster, how to get a driver’s license in France, buy your fishing license online, buy license for fishing, get drivers permit Florida, buy Florida drivers license, do you need a Florida driver’s license to. buy a gun IN Florida, how to get a Georgia driver’s license, can i buy a drivers license online, can you buy a gun without a drivers license 2025, buy German driver’s license, can you buy a gun with a temporary driver’s license, can you buy a gun with a suspended driver’s license, get drivers license Houston, how to get a Hawaii driver’s license, how to buy drivers license, how to buy drivers license online, buy here pay here no drivers license, how much is it to buy your driver’s license, buy drivers license in UK, get drivers license in Texas, get drivers license in Florida, get drivers license Ireland, how to get an Illinois driver’s license get drivers license in Arizona, how to get a driver’s license in a new state, buy international drivers license, buy international drivers license online, how to buy a drivers license in south africa
Telegram: +1 (725) 867-9567
Email: authenticnotes5@gmail.com
(Telegram: Zhaochen44)
WeChat: Scottbowers44
https://counterfeitdocsforsale.com/product-category/buy-drivers-license/
https://www.counterfeitdocsforsale.com/buy-uk-drivers-license-online/