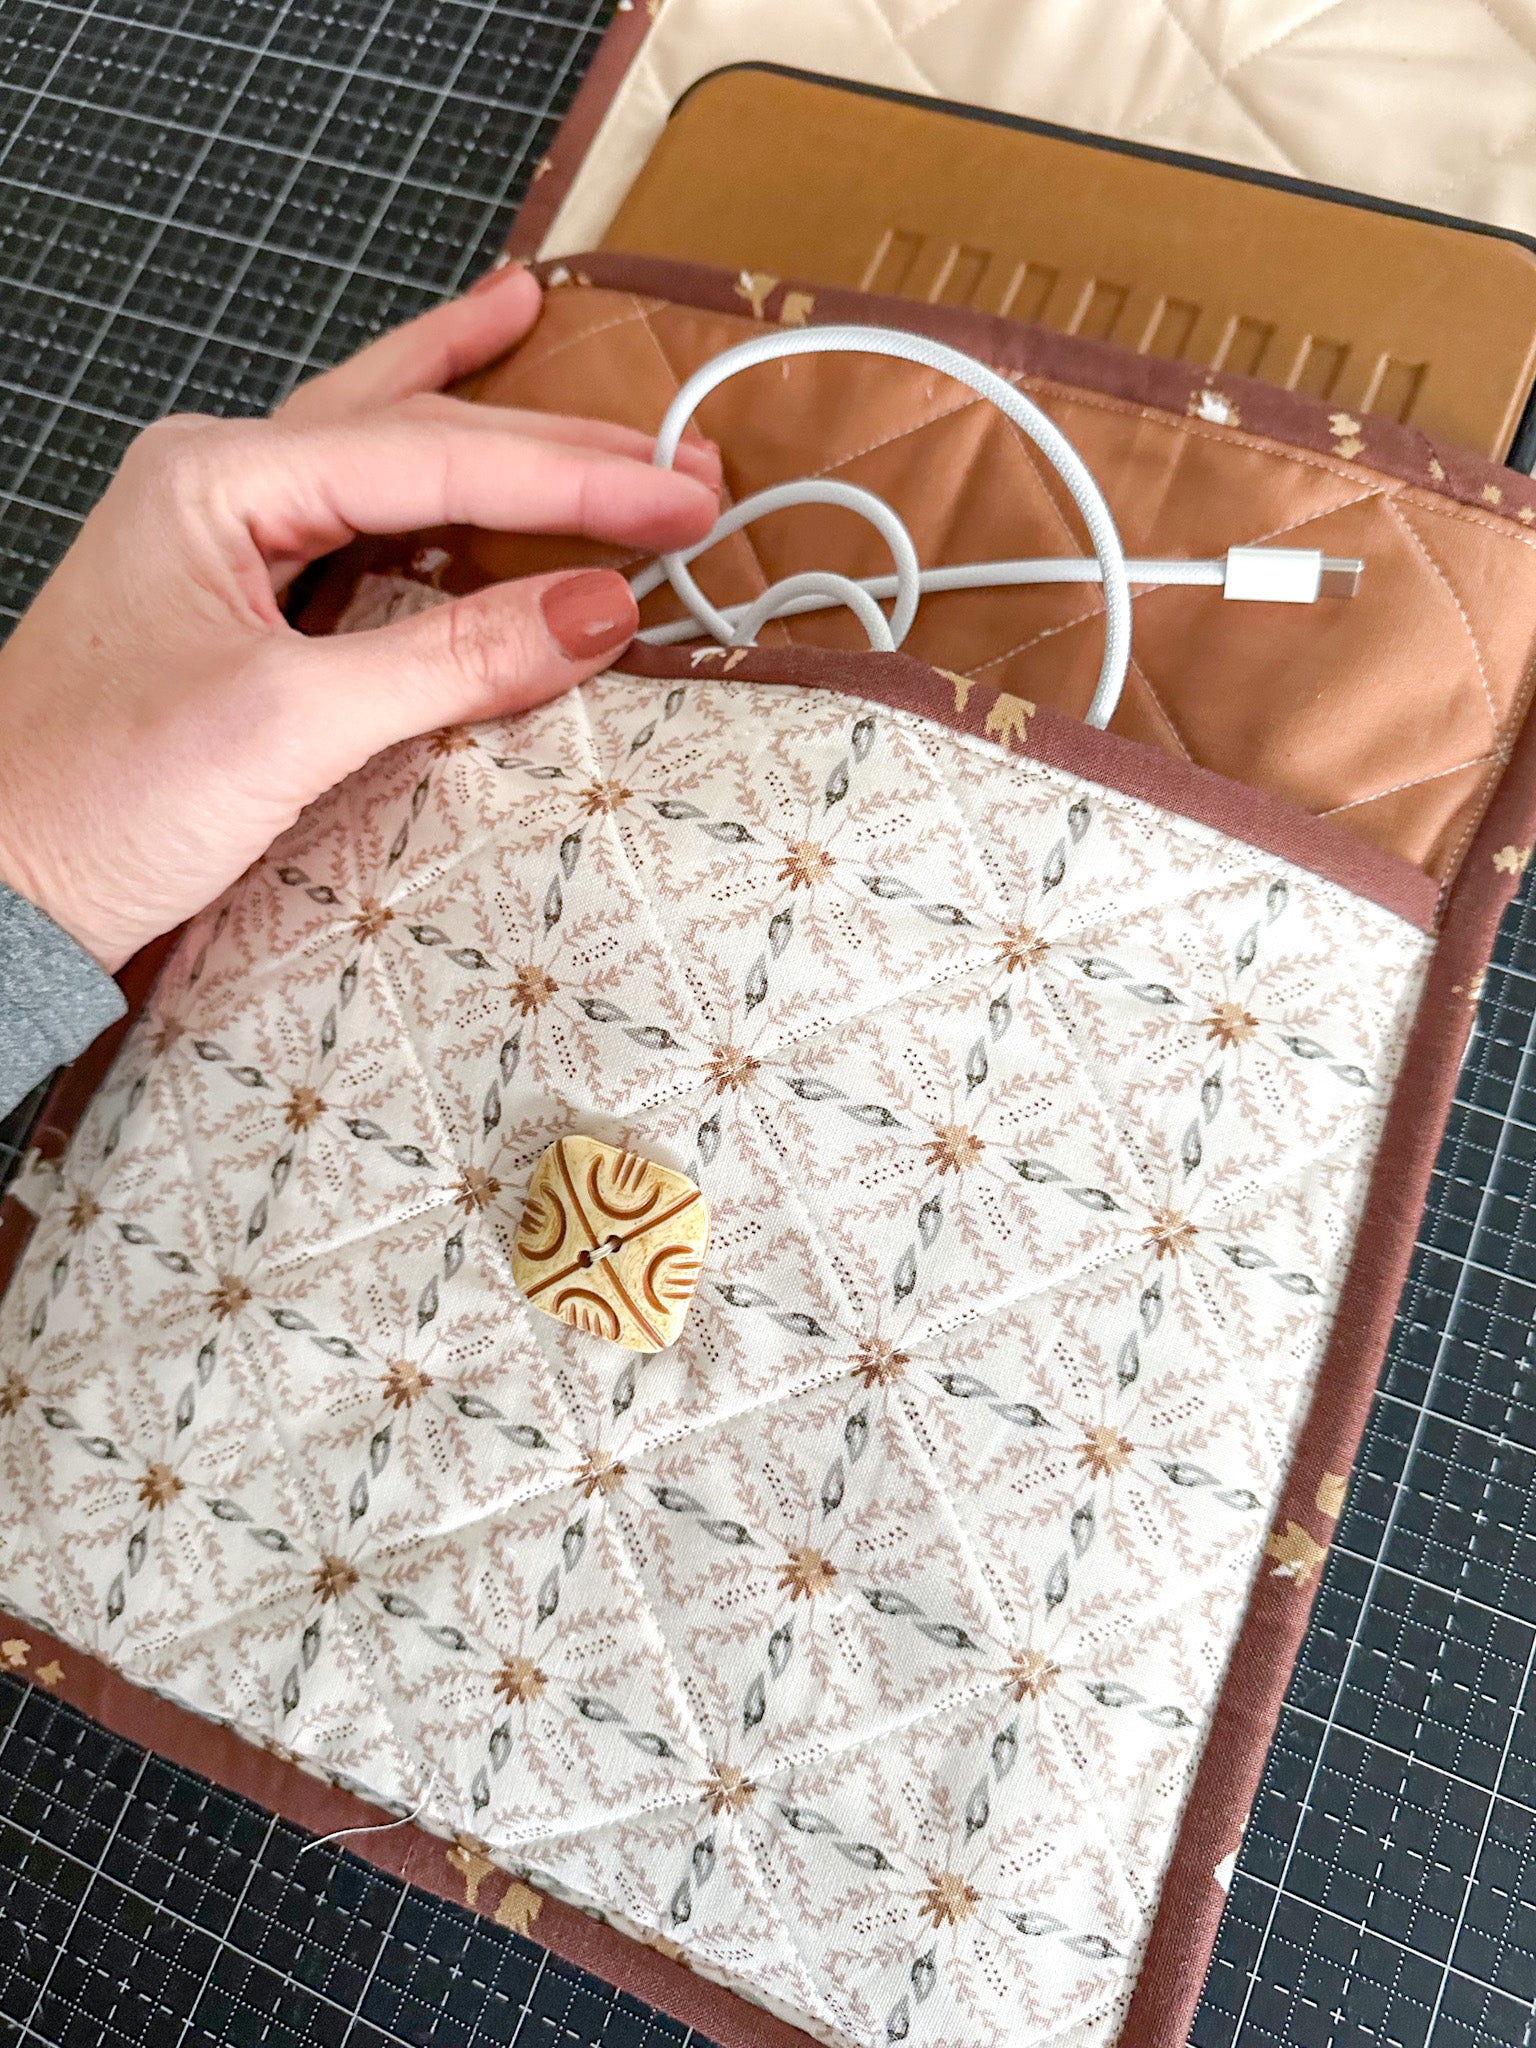
Looking for a quick project to use up a few scraps? This DIY quilted iPad case is the perfect afternoon project, and creates such a beautiful protective layer for your device! This version also includes a pocket (who doesn't love pockets!), to store your charger or notepad. This is a quick, simple tutorial to create a iPad cover regardless of the size of your device. Leave a comment below, and tell me what you love best about this project!
Fabric Requirements:
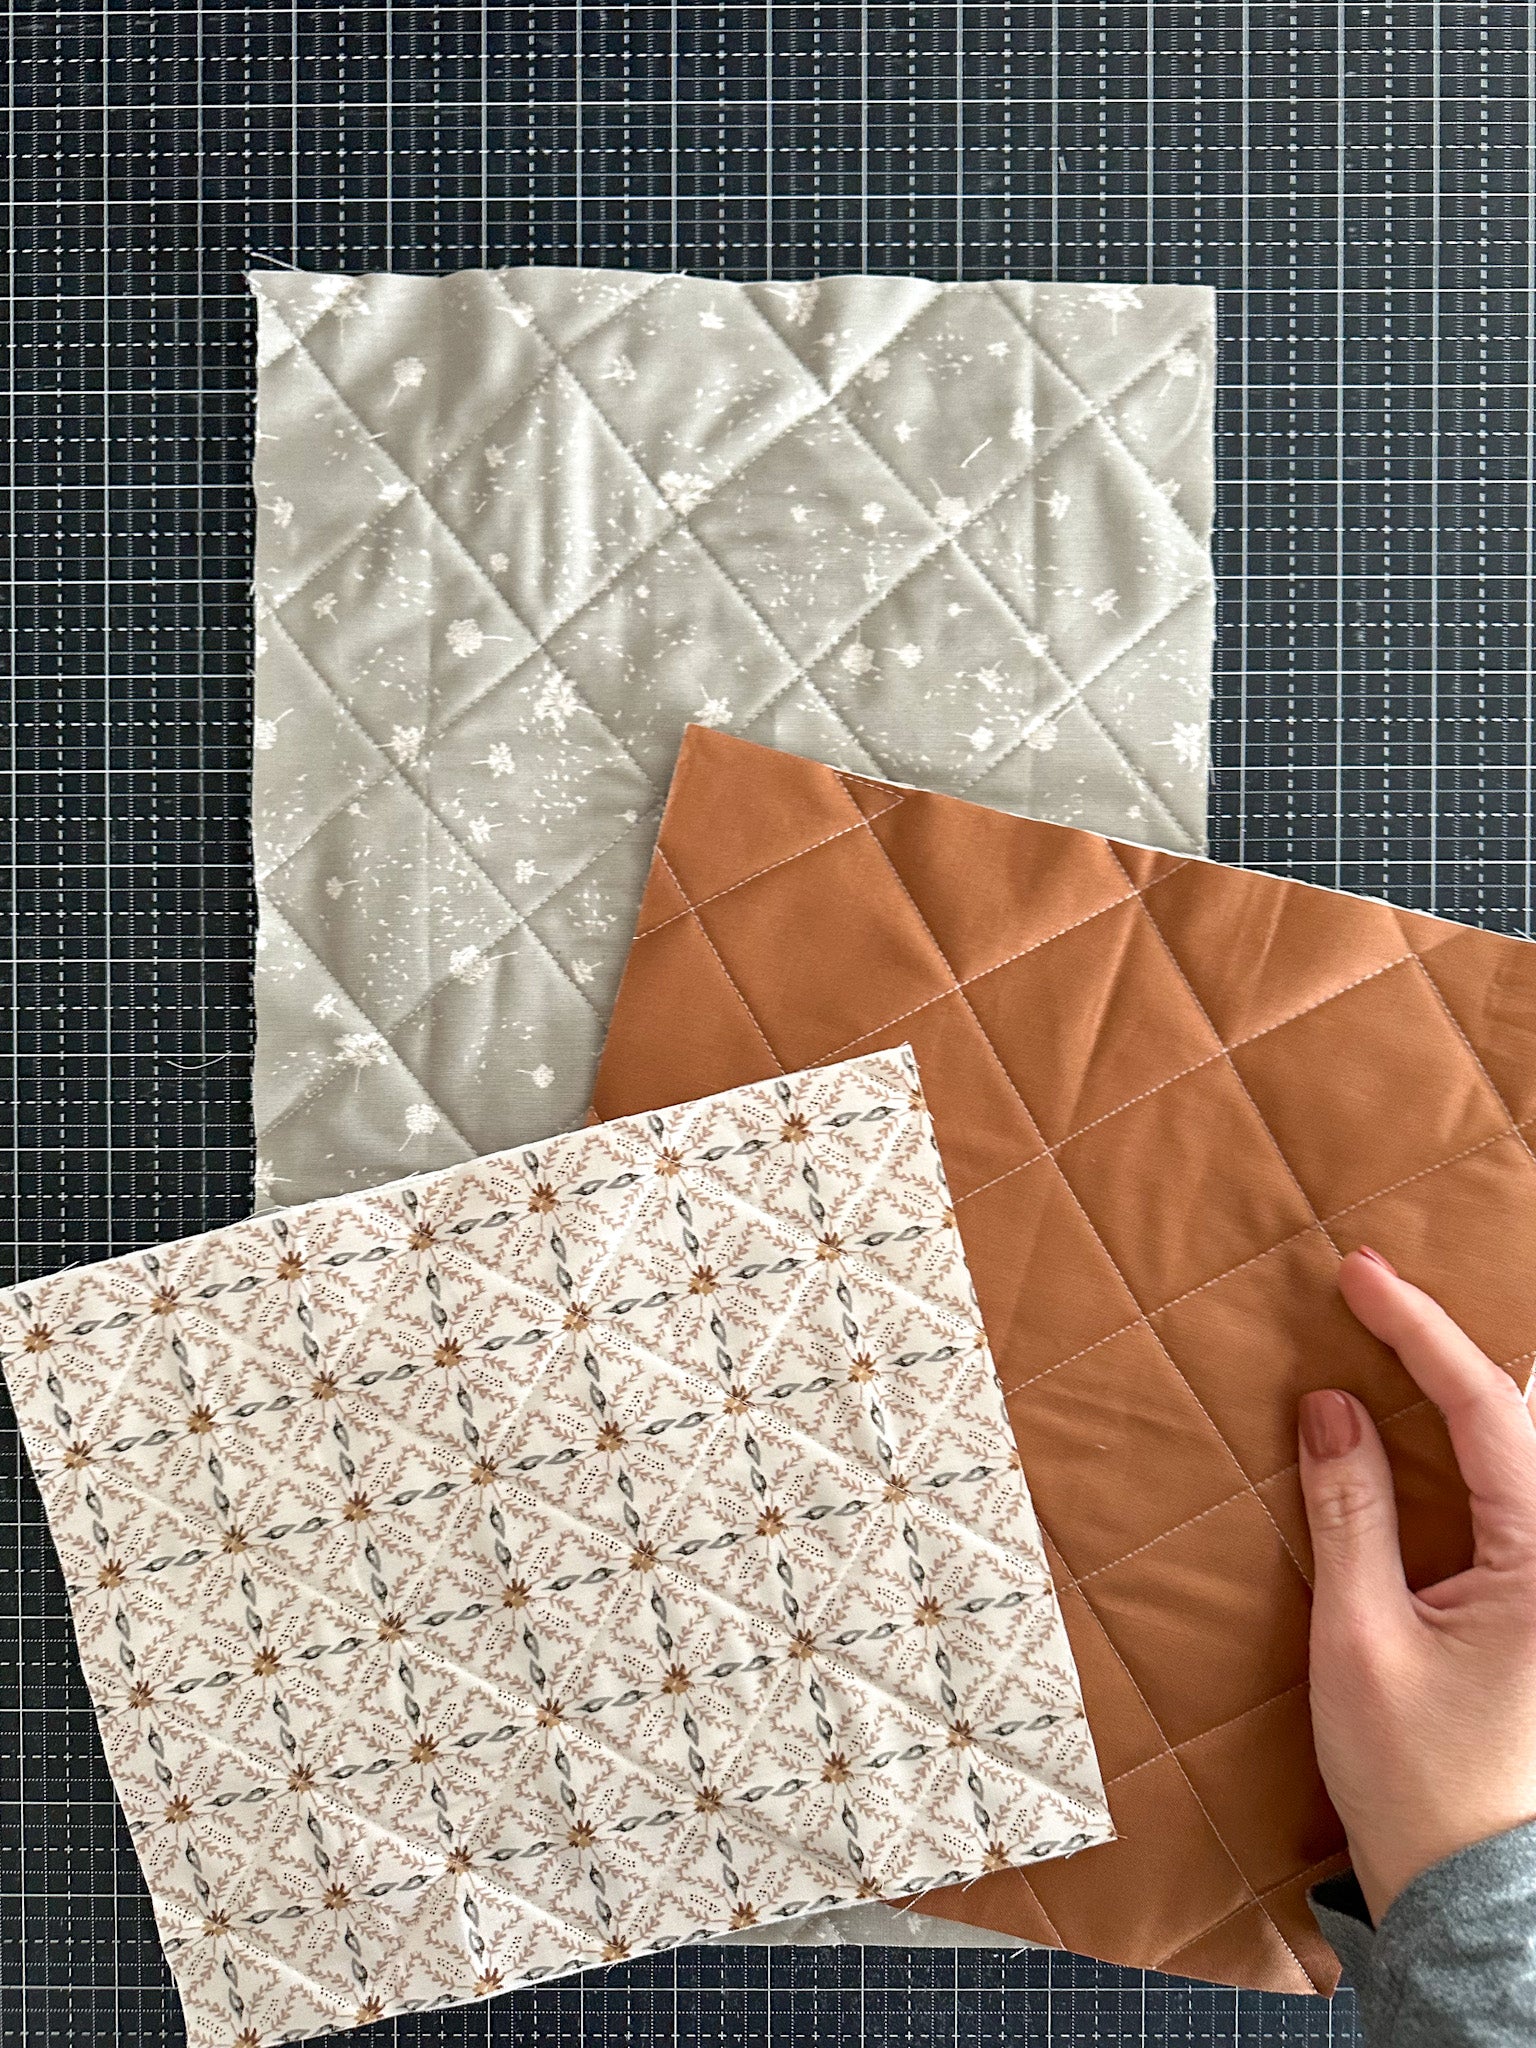
- 2 FQs of coordinating fabric (front and backing) or I used scraps from my Riley Blake Dancing Daisies Collection and Confetti solids line. An 11" iPad Pro, requires enough fabric to create 3 sections: 9.5" x 16", 9.5" x 11", & 8" x 9.5"
- Batting scrap
- Binding
- Bias tape scrap
What you need:
Take FQs or fabric scraps, and backing fabric. Baste the fabric to the batting using adhesive spray, and quilt as desired. Mark the quilting lines with your hera marker. I chose a simple 1.5” grid so the final result would be non-directional.
After quilting the FQs or sections, cut the 3 sections of the case: Back panel, front panel, and optional pocket panel. I used measurements to fit my 11" iPad, but sizes vary so I recommend cutting each panel 1" wider than your iPad. Cut 3 sections measuring: 9.5" x 16" (back), 9.5" x 11" (front), & 8" x 9.5" (pocket).
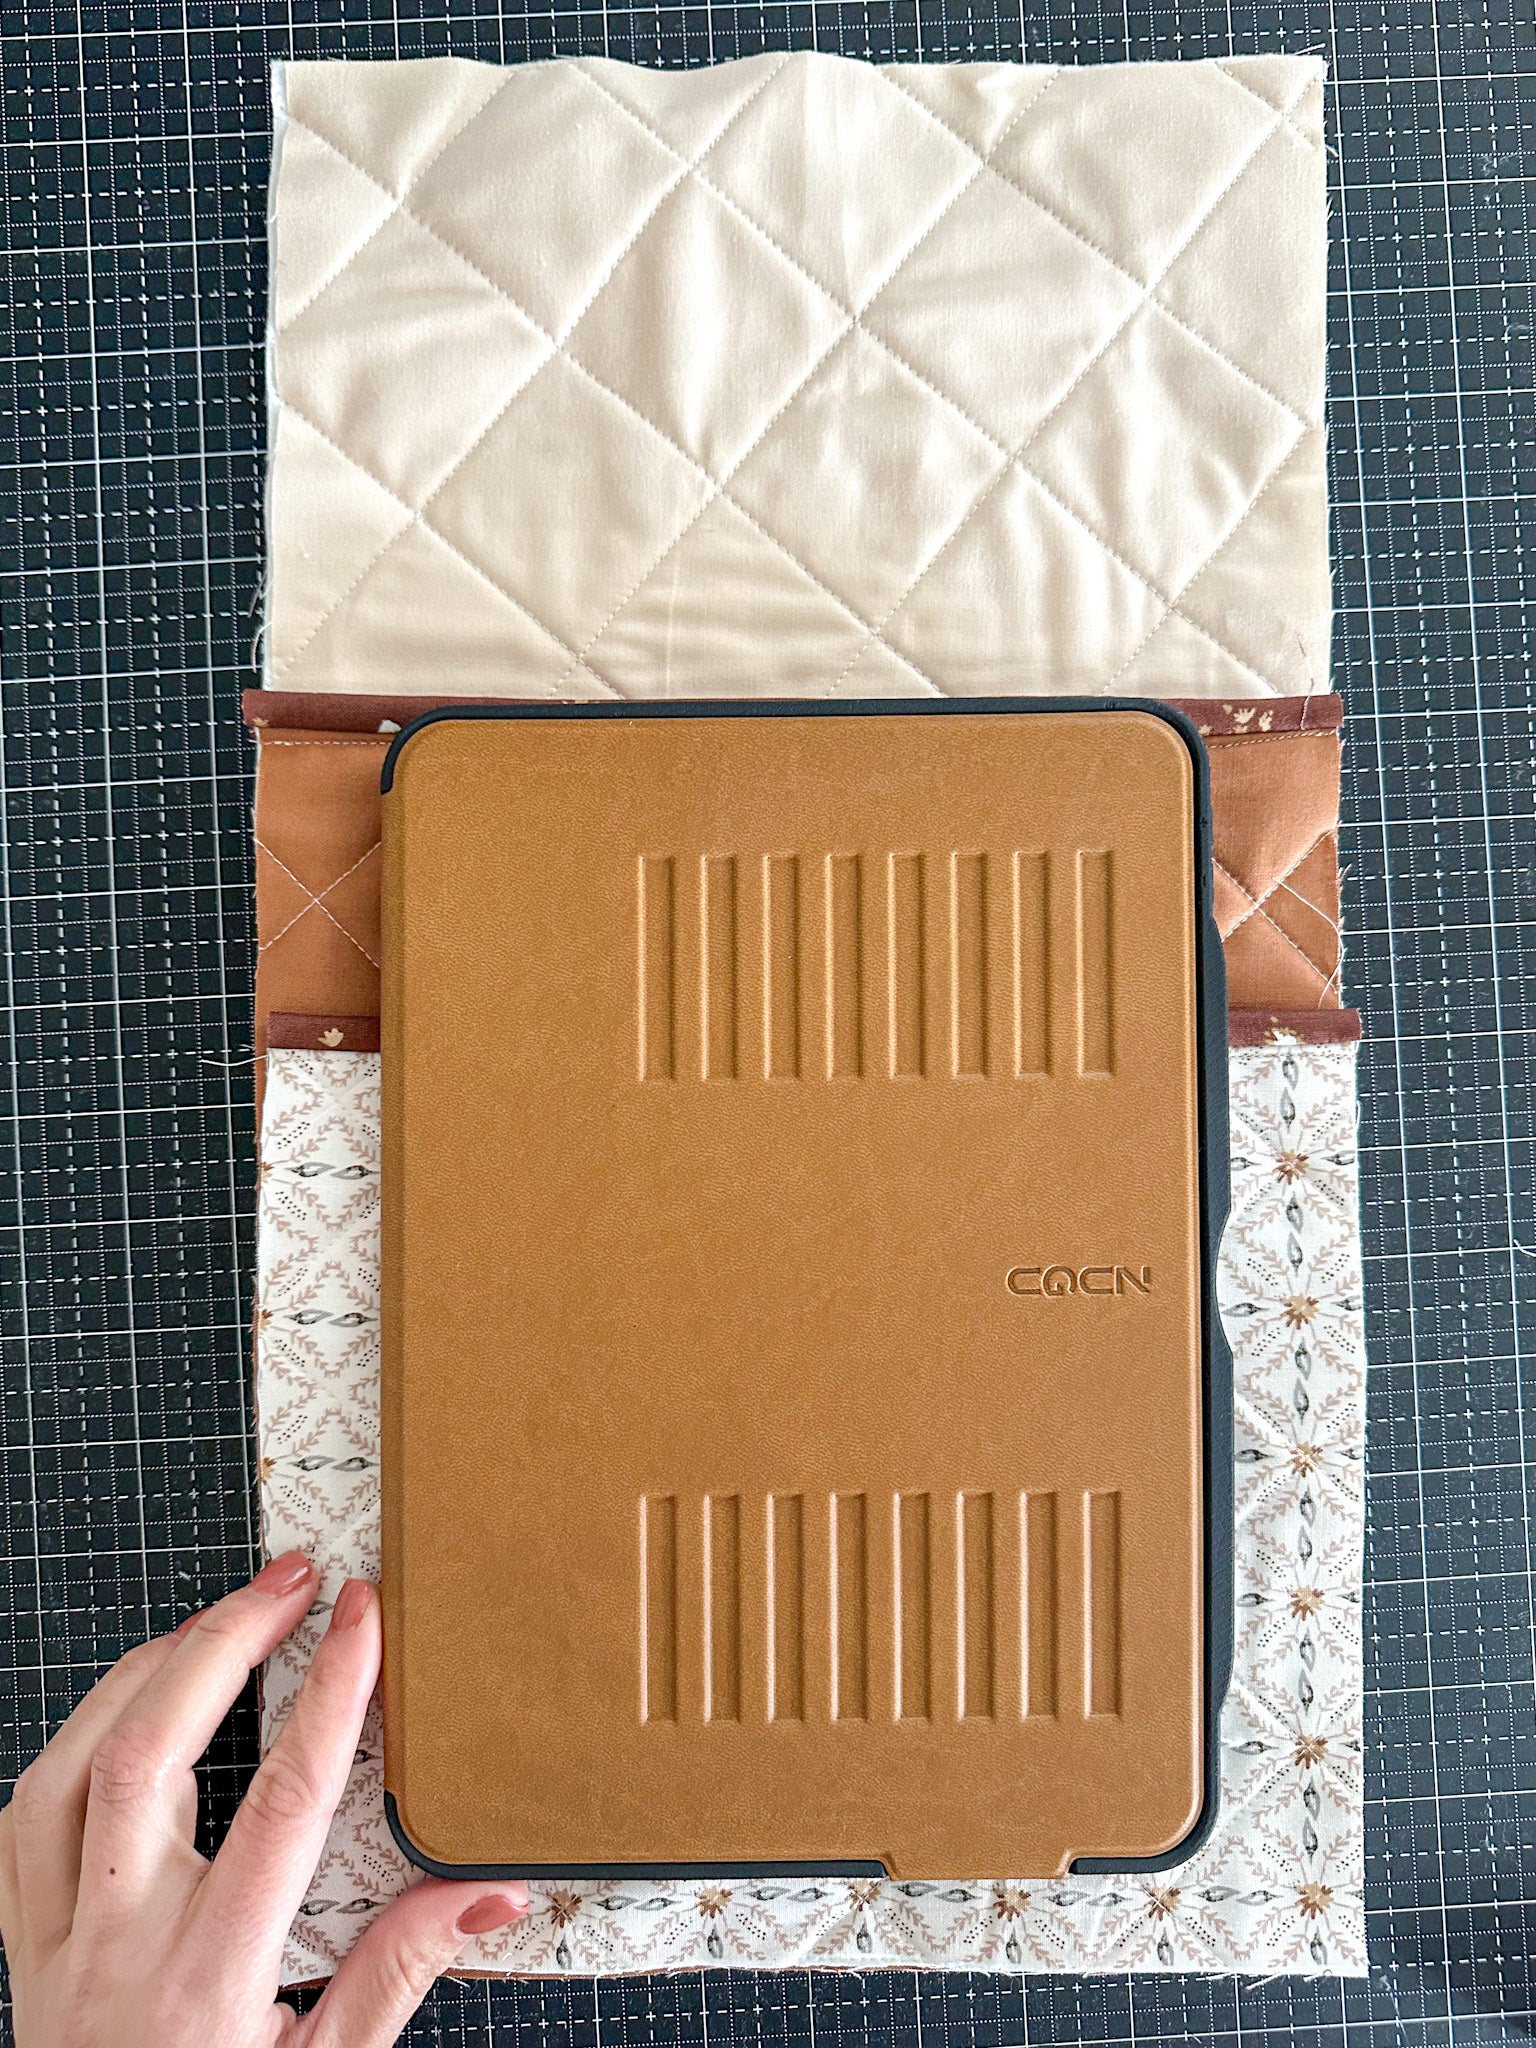
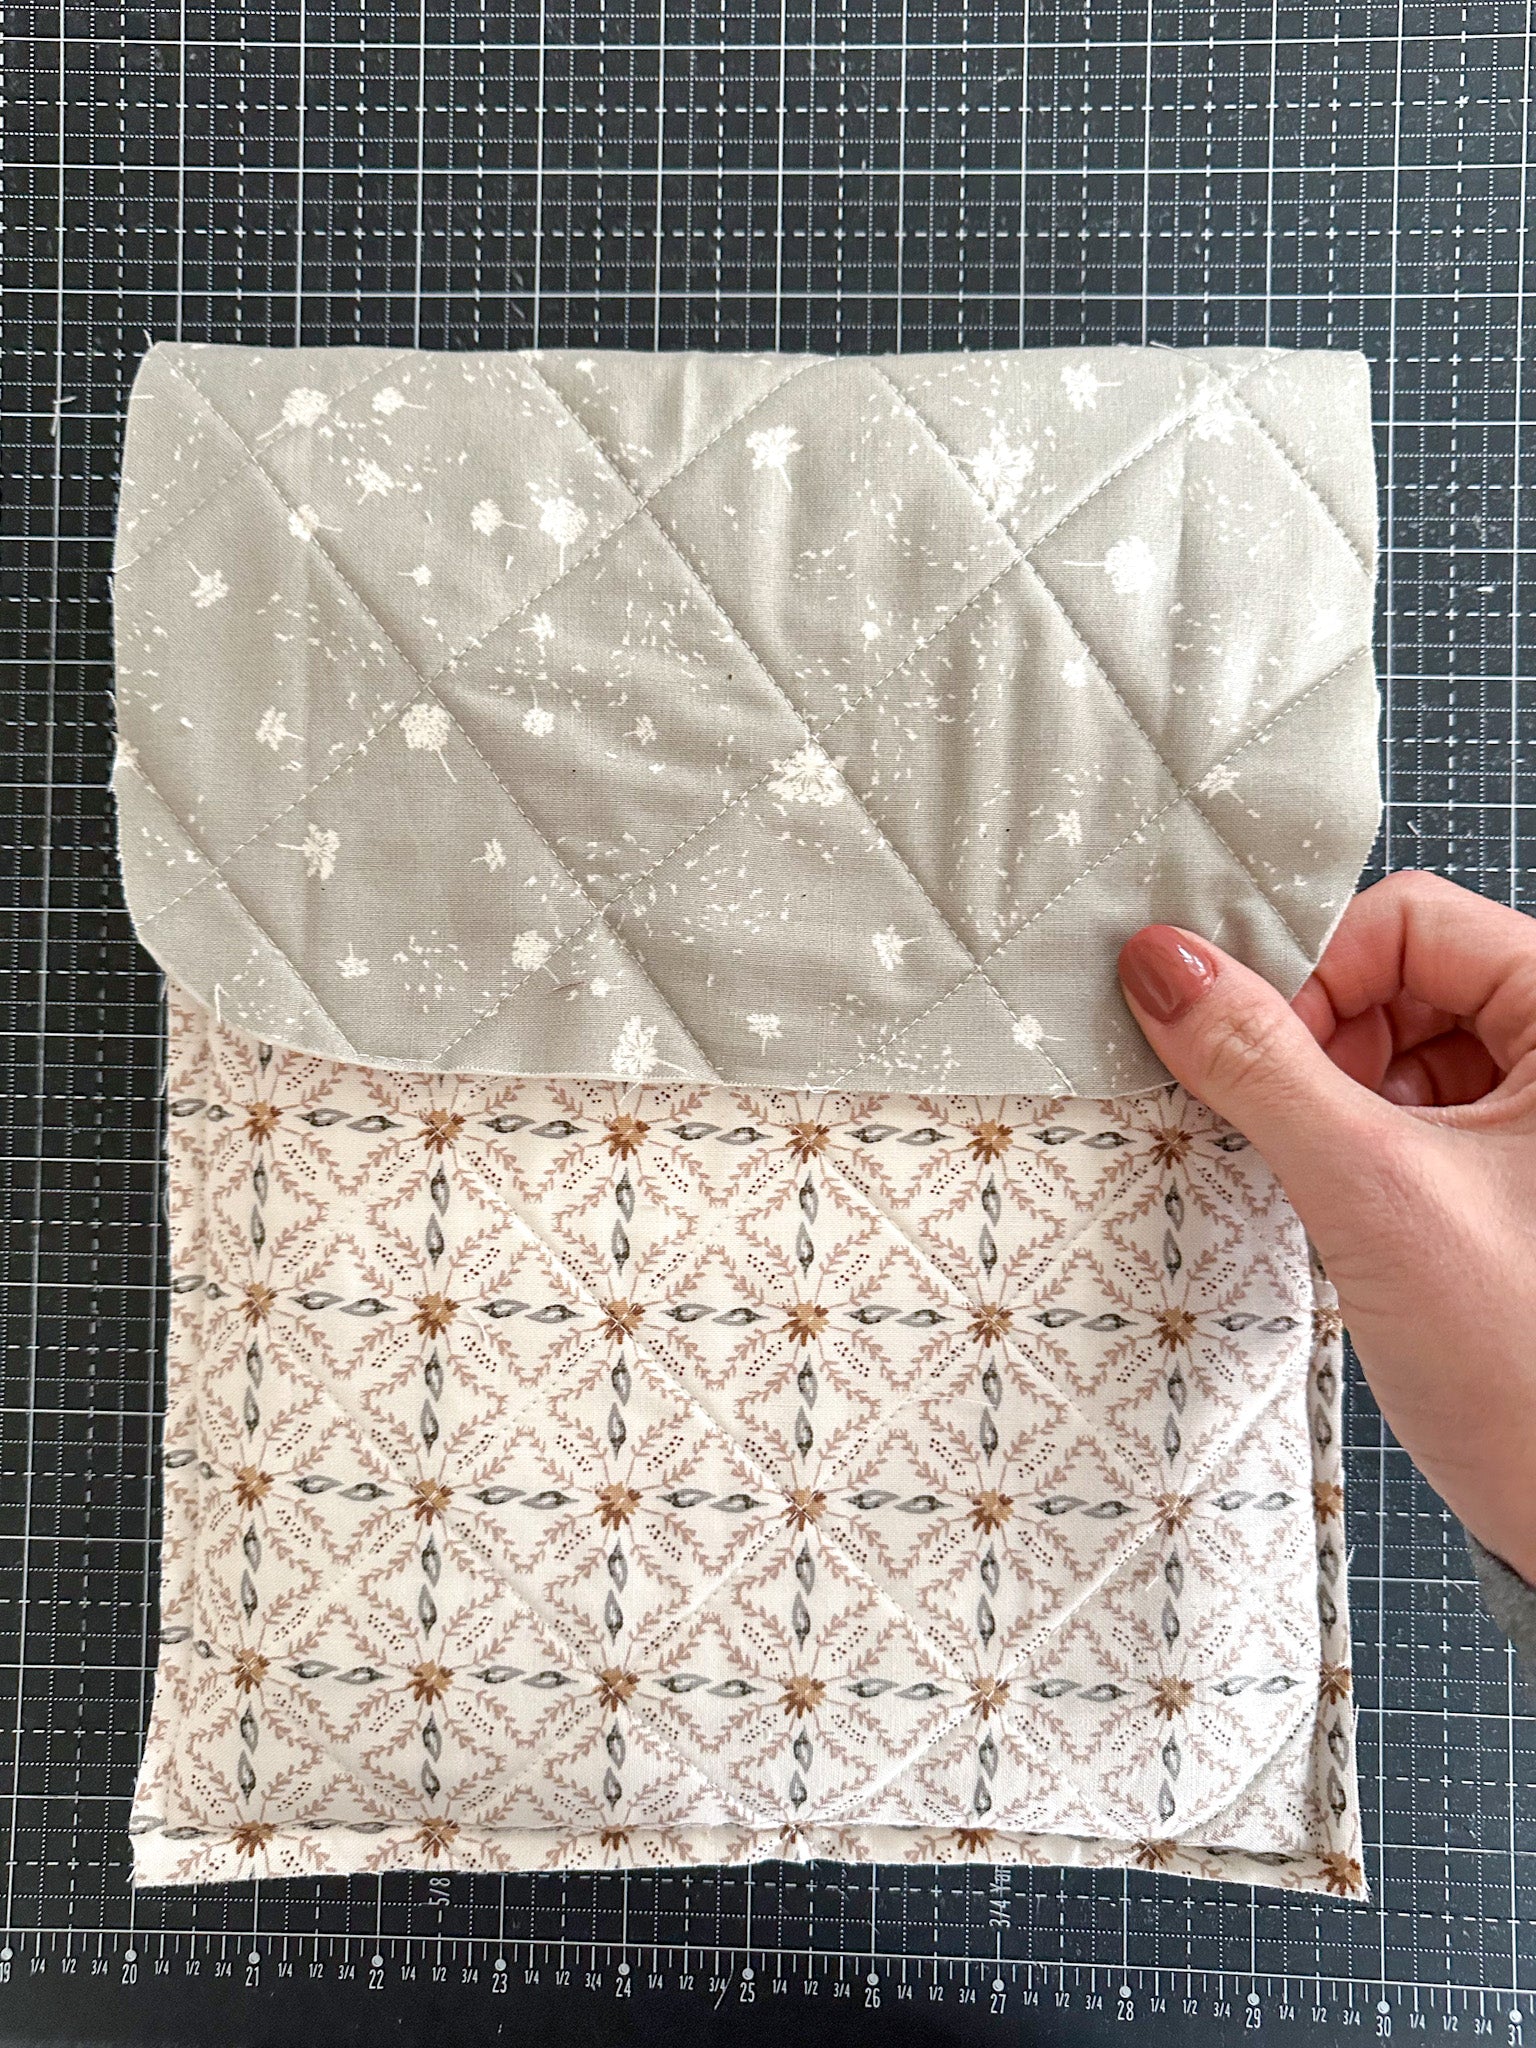
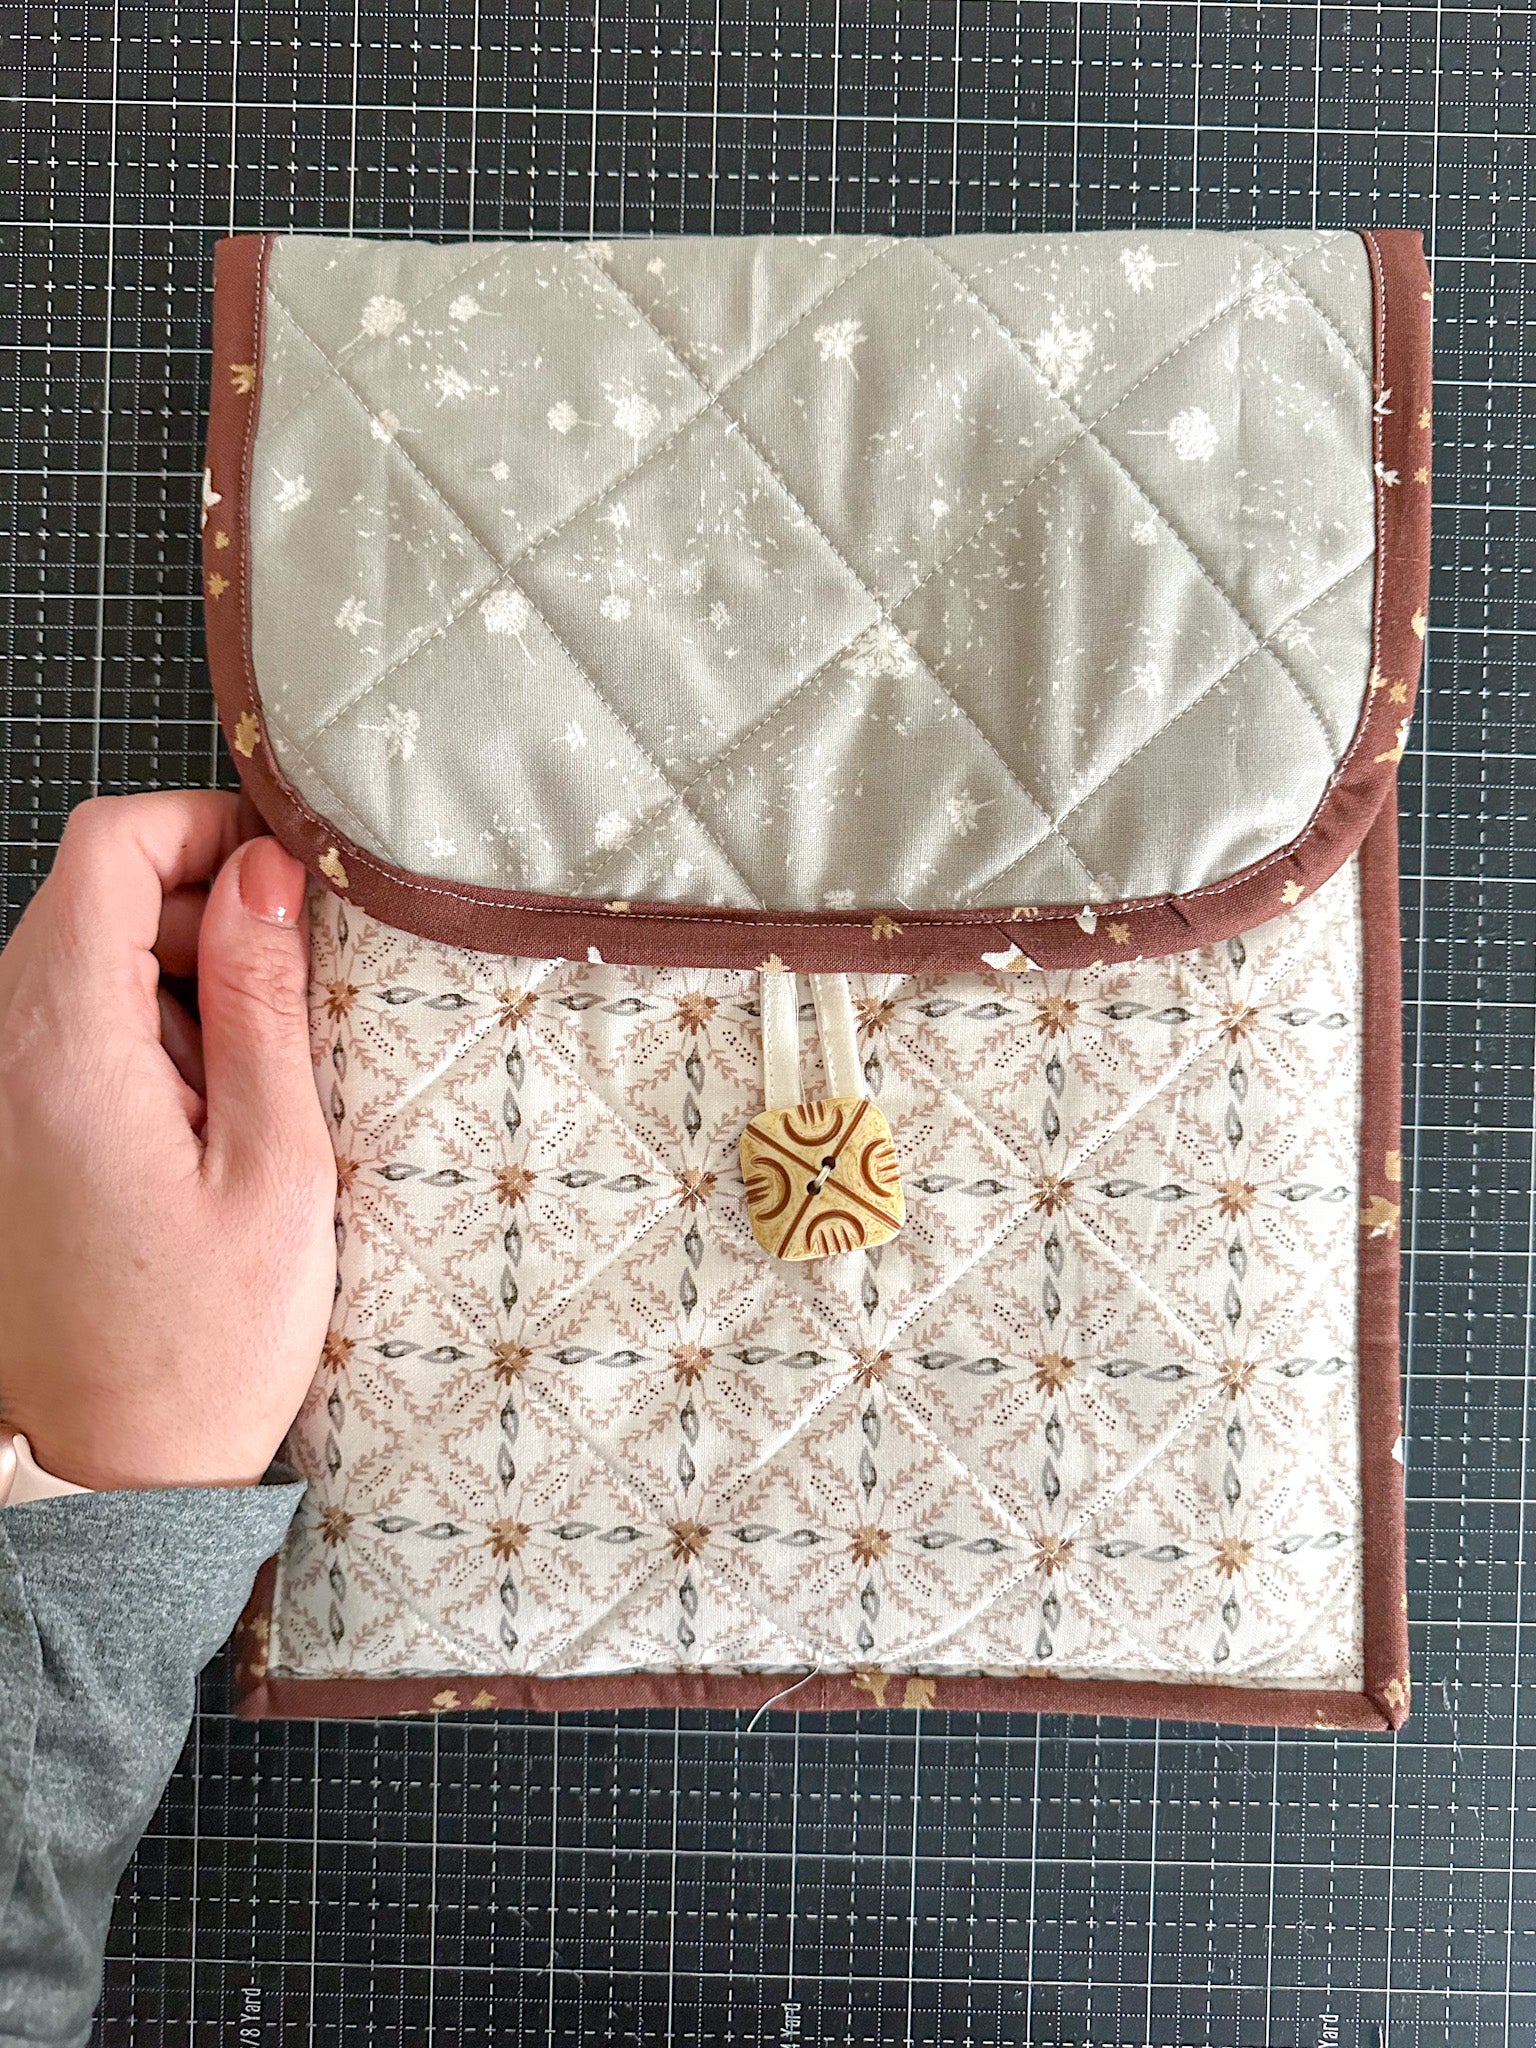
Take binding pieces and bind the upper edges of the front and pocket panels (as shown in photos above). Be sure to do this before sewing the sections together, it is so much easier!
After attaching the bindings, lay out the sections and place your iPad on top to visualize the completed case. As you can see in the photo above, my first sections had more overlap on each side than the suggested .5". I started with a 2" excess (1" on each side) to be sure I had enough room. But once the sections were sewn together, I realized I wanted a more snug fit. In my opinion, .5" excess on each side is ideal! It holds the device tightly without being bulky.
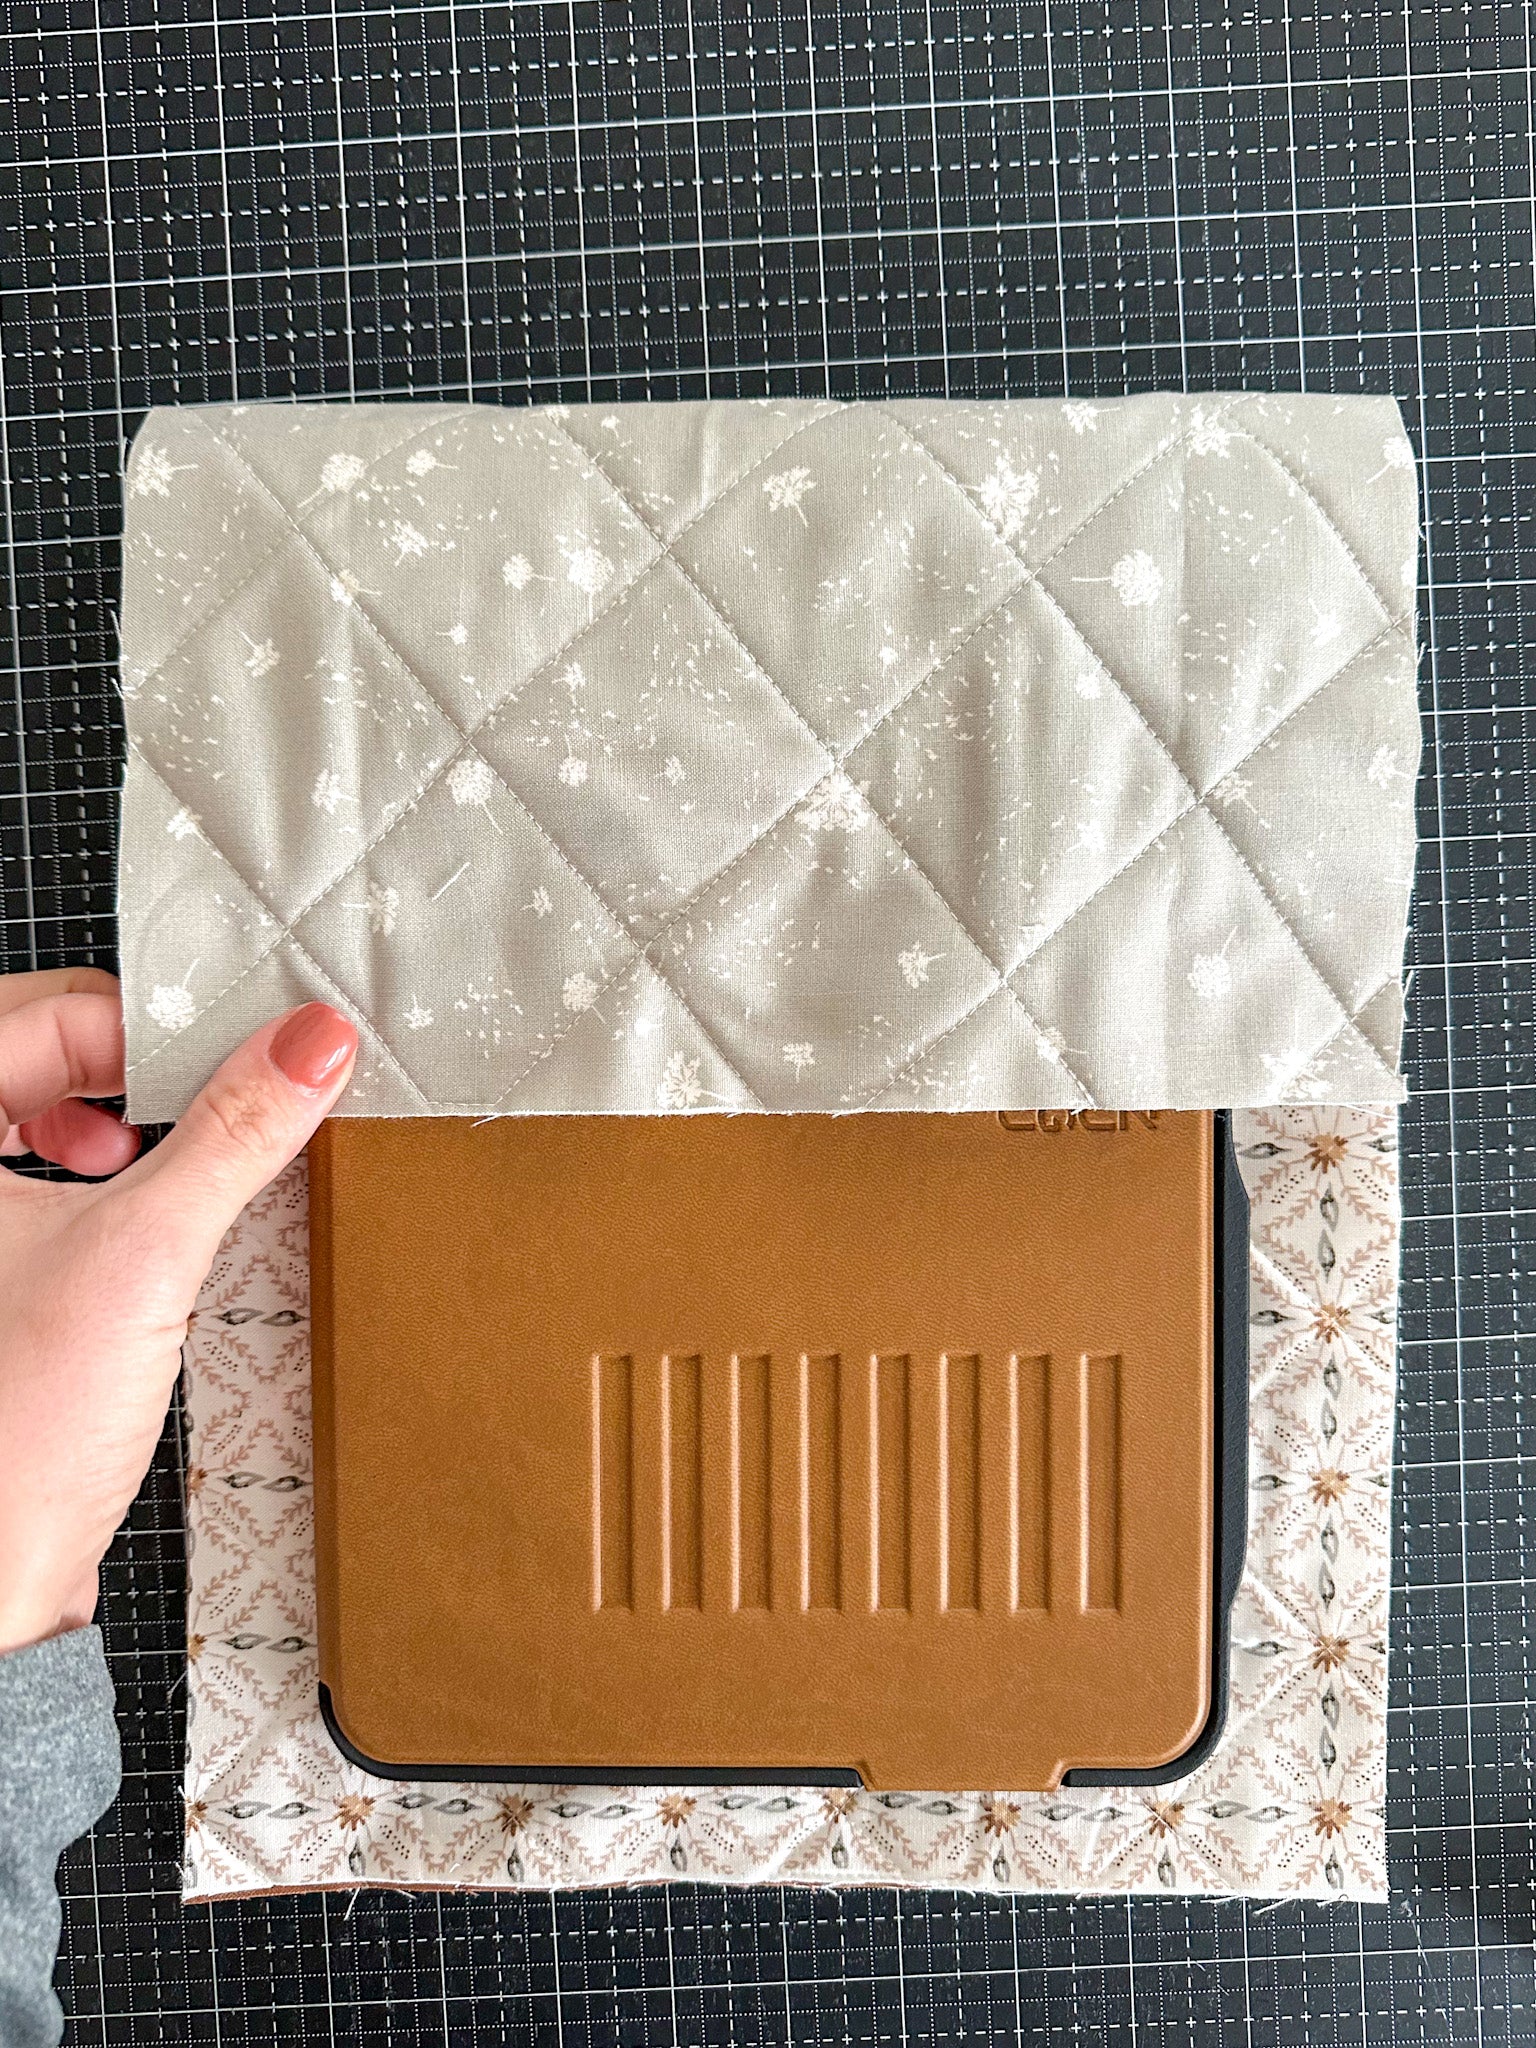
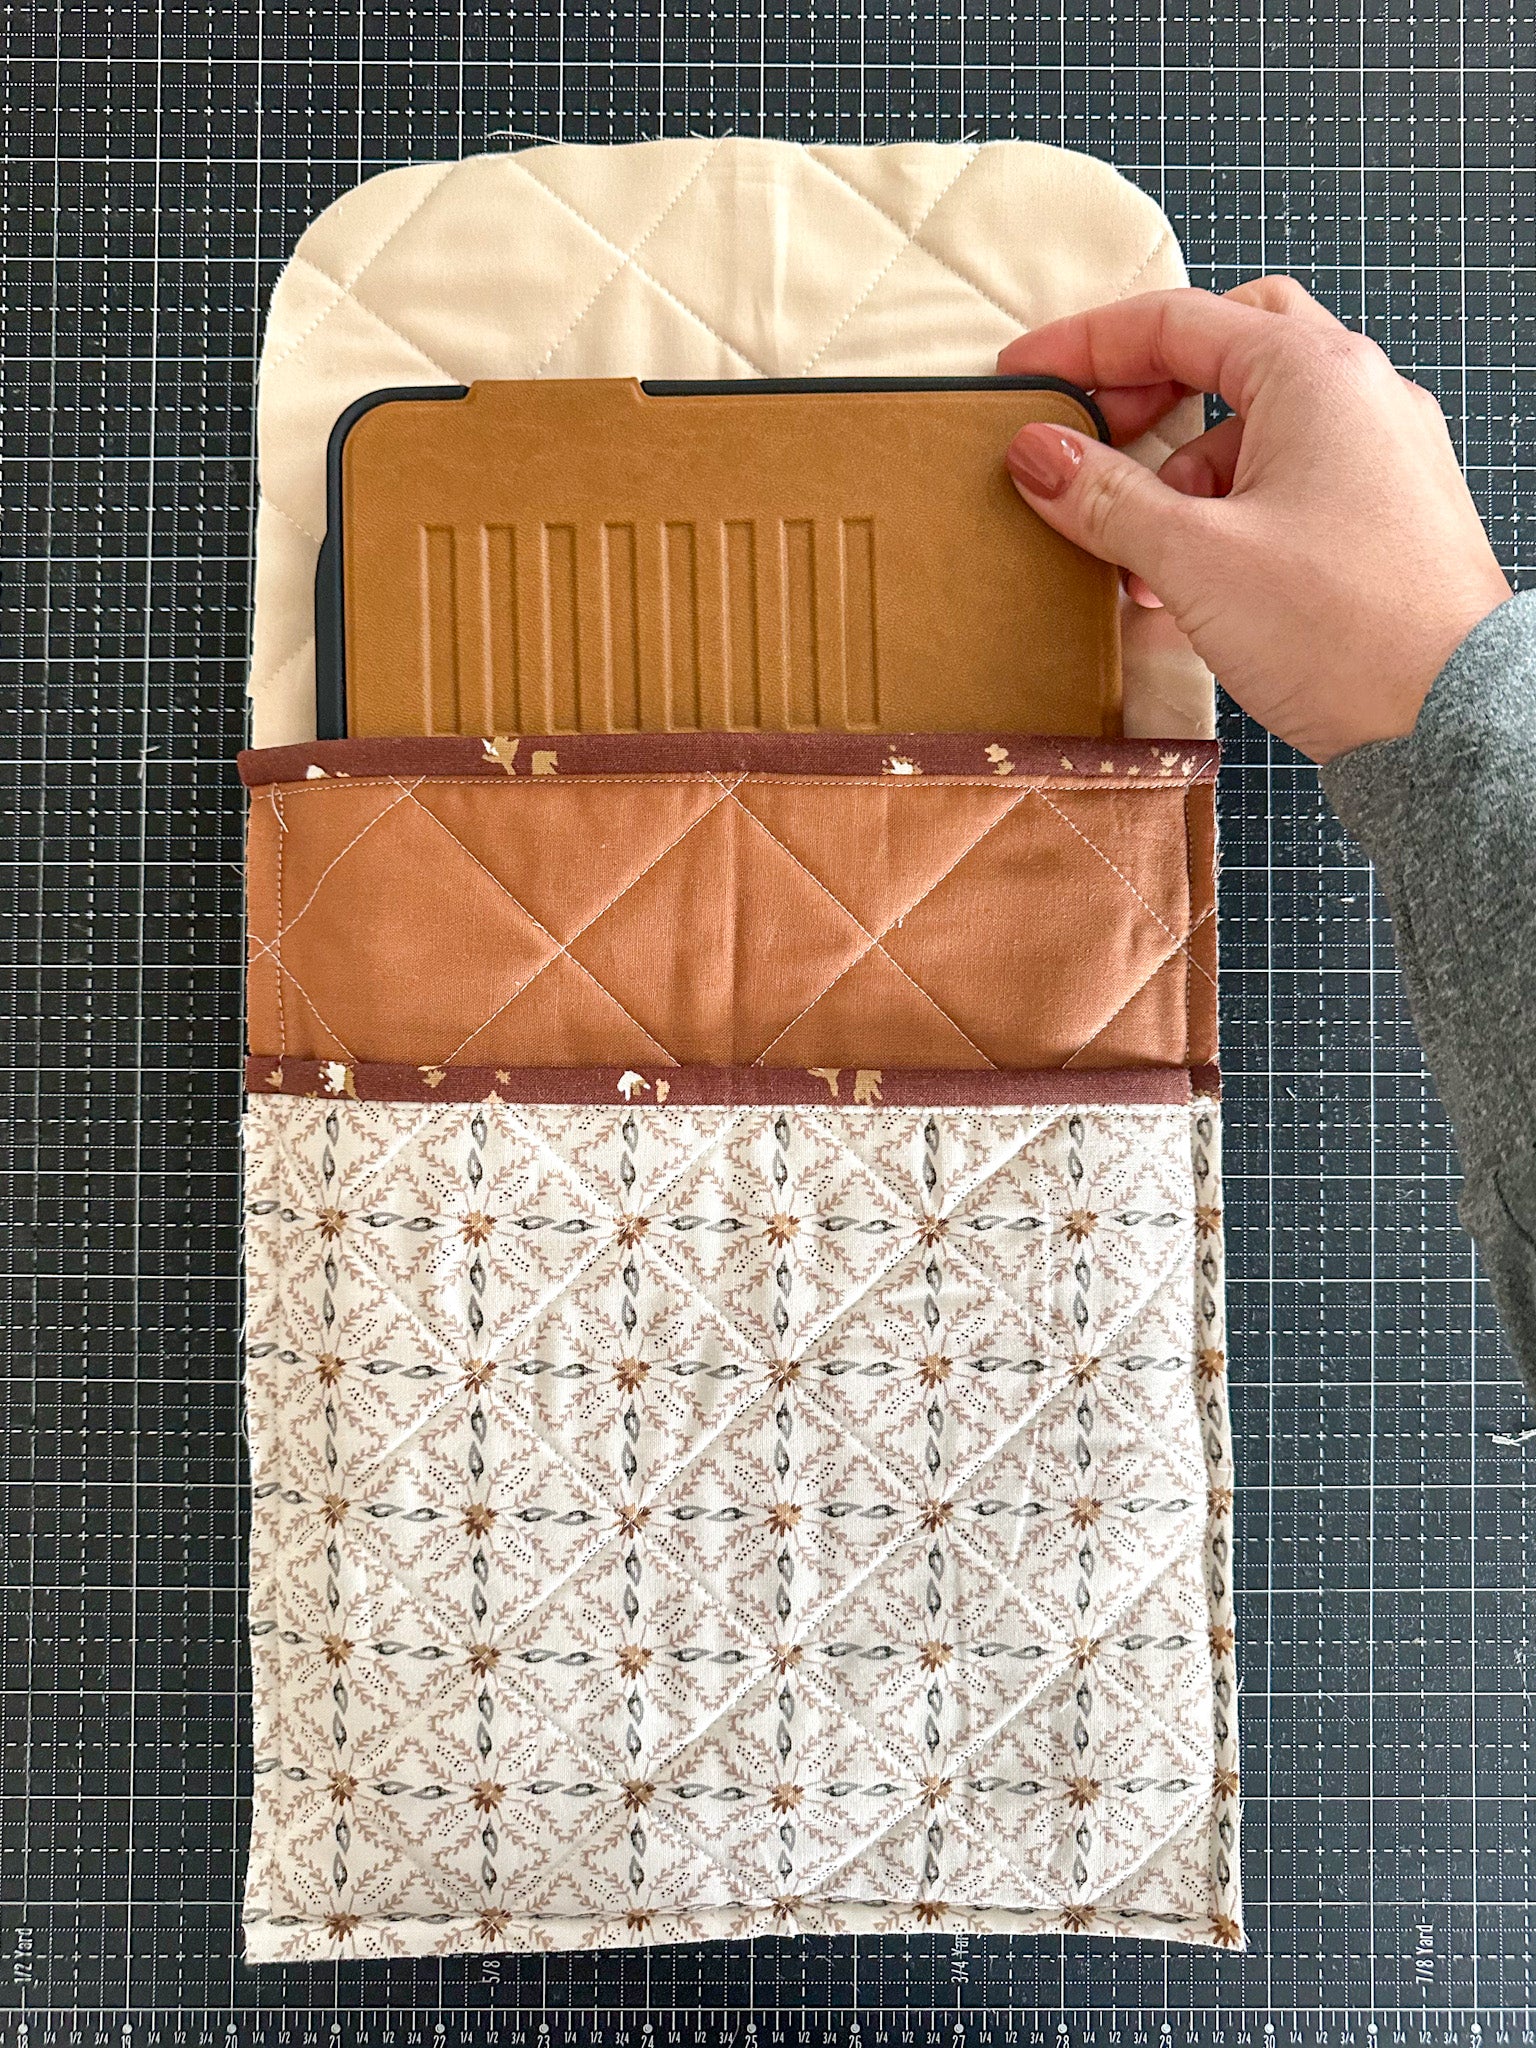
Next, fold the back flap forward to see if you have the right amount of overlap. My overlap was about 5.5", although this is based on personal preference. If you want more or less, that's totally fine! At this point, I also rounded the corners of my back panel. To create the rounded edge, fold the section in half, trace the edge of a cup (or other curved profile), and trim the corners. There's also the option of no flap, which is a super cute alternative! In that case, the front and back panels would be the same size.
Once you're confident in the sizing, get ready to sew your sections together! This is where Wonder Clips will become your best friends. It is really hard to pin 3 layers of quilted fabric together without distortion, but these clips make it easy to align your sections for stitching. Clip the 3 sections wrong-sides together. Did you catch that? - wrong-sides together. Sew along the front panel to secure the sections together.
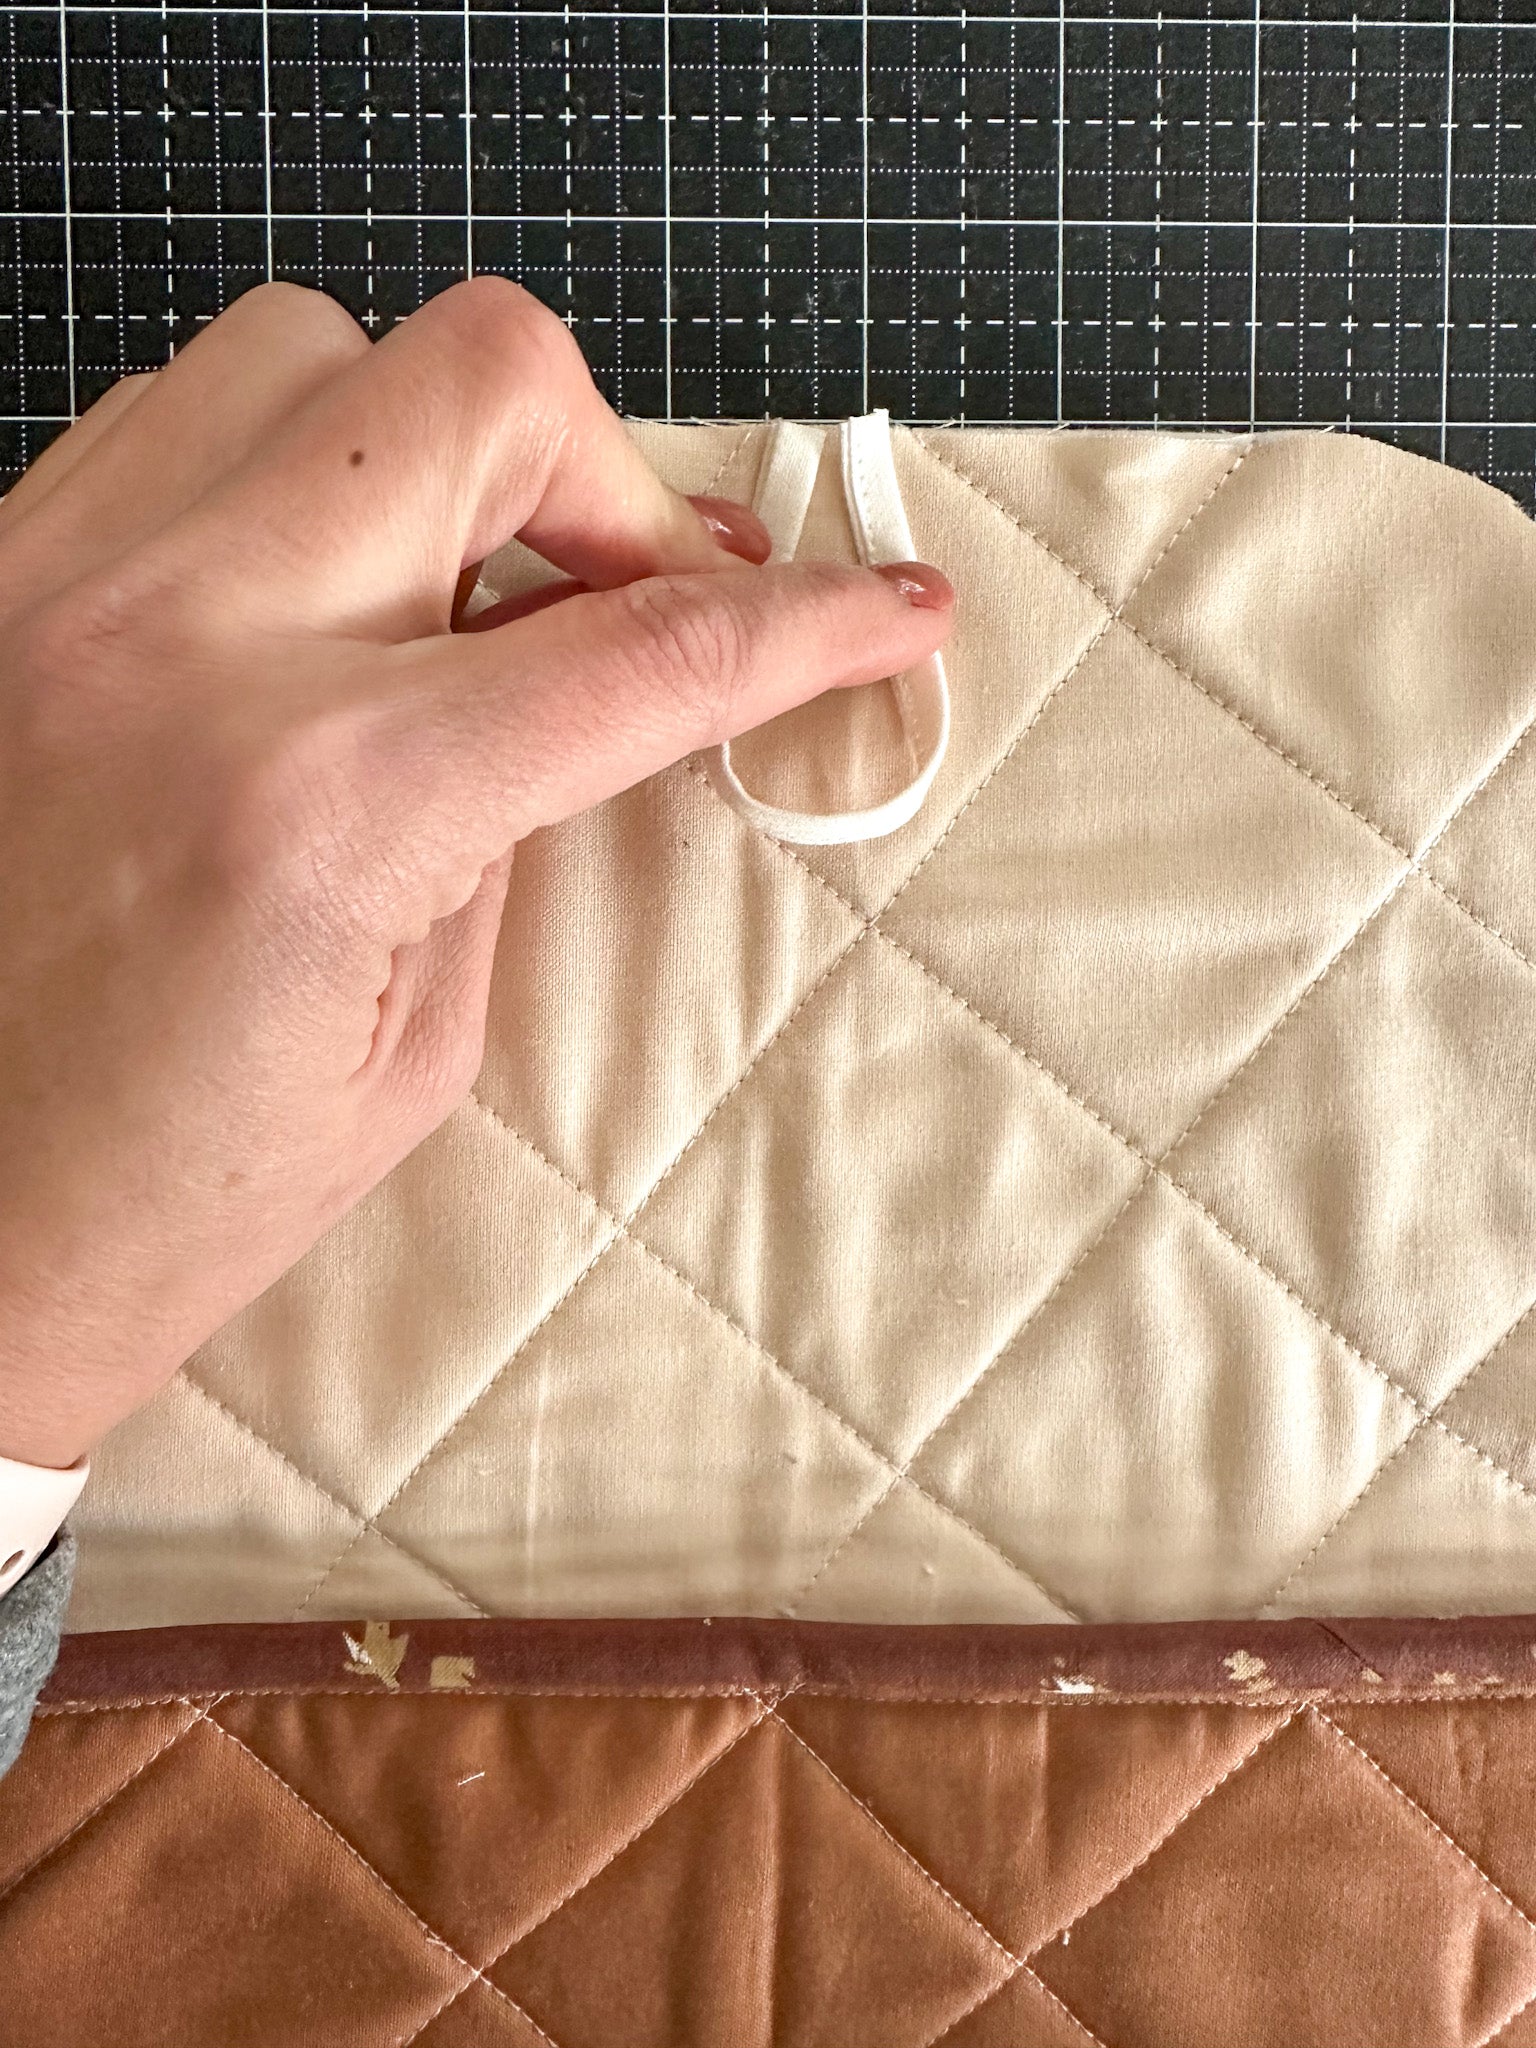
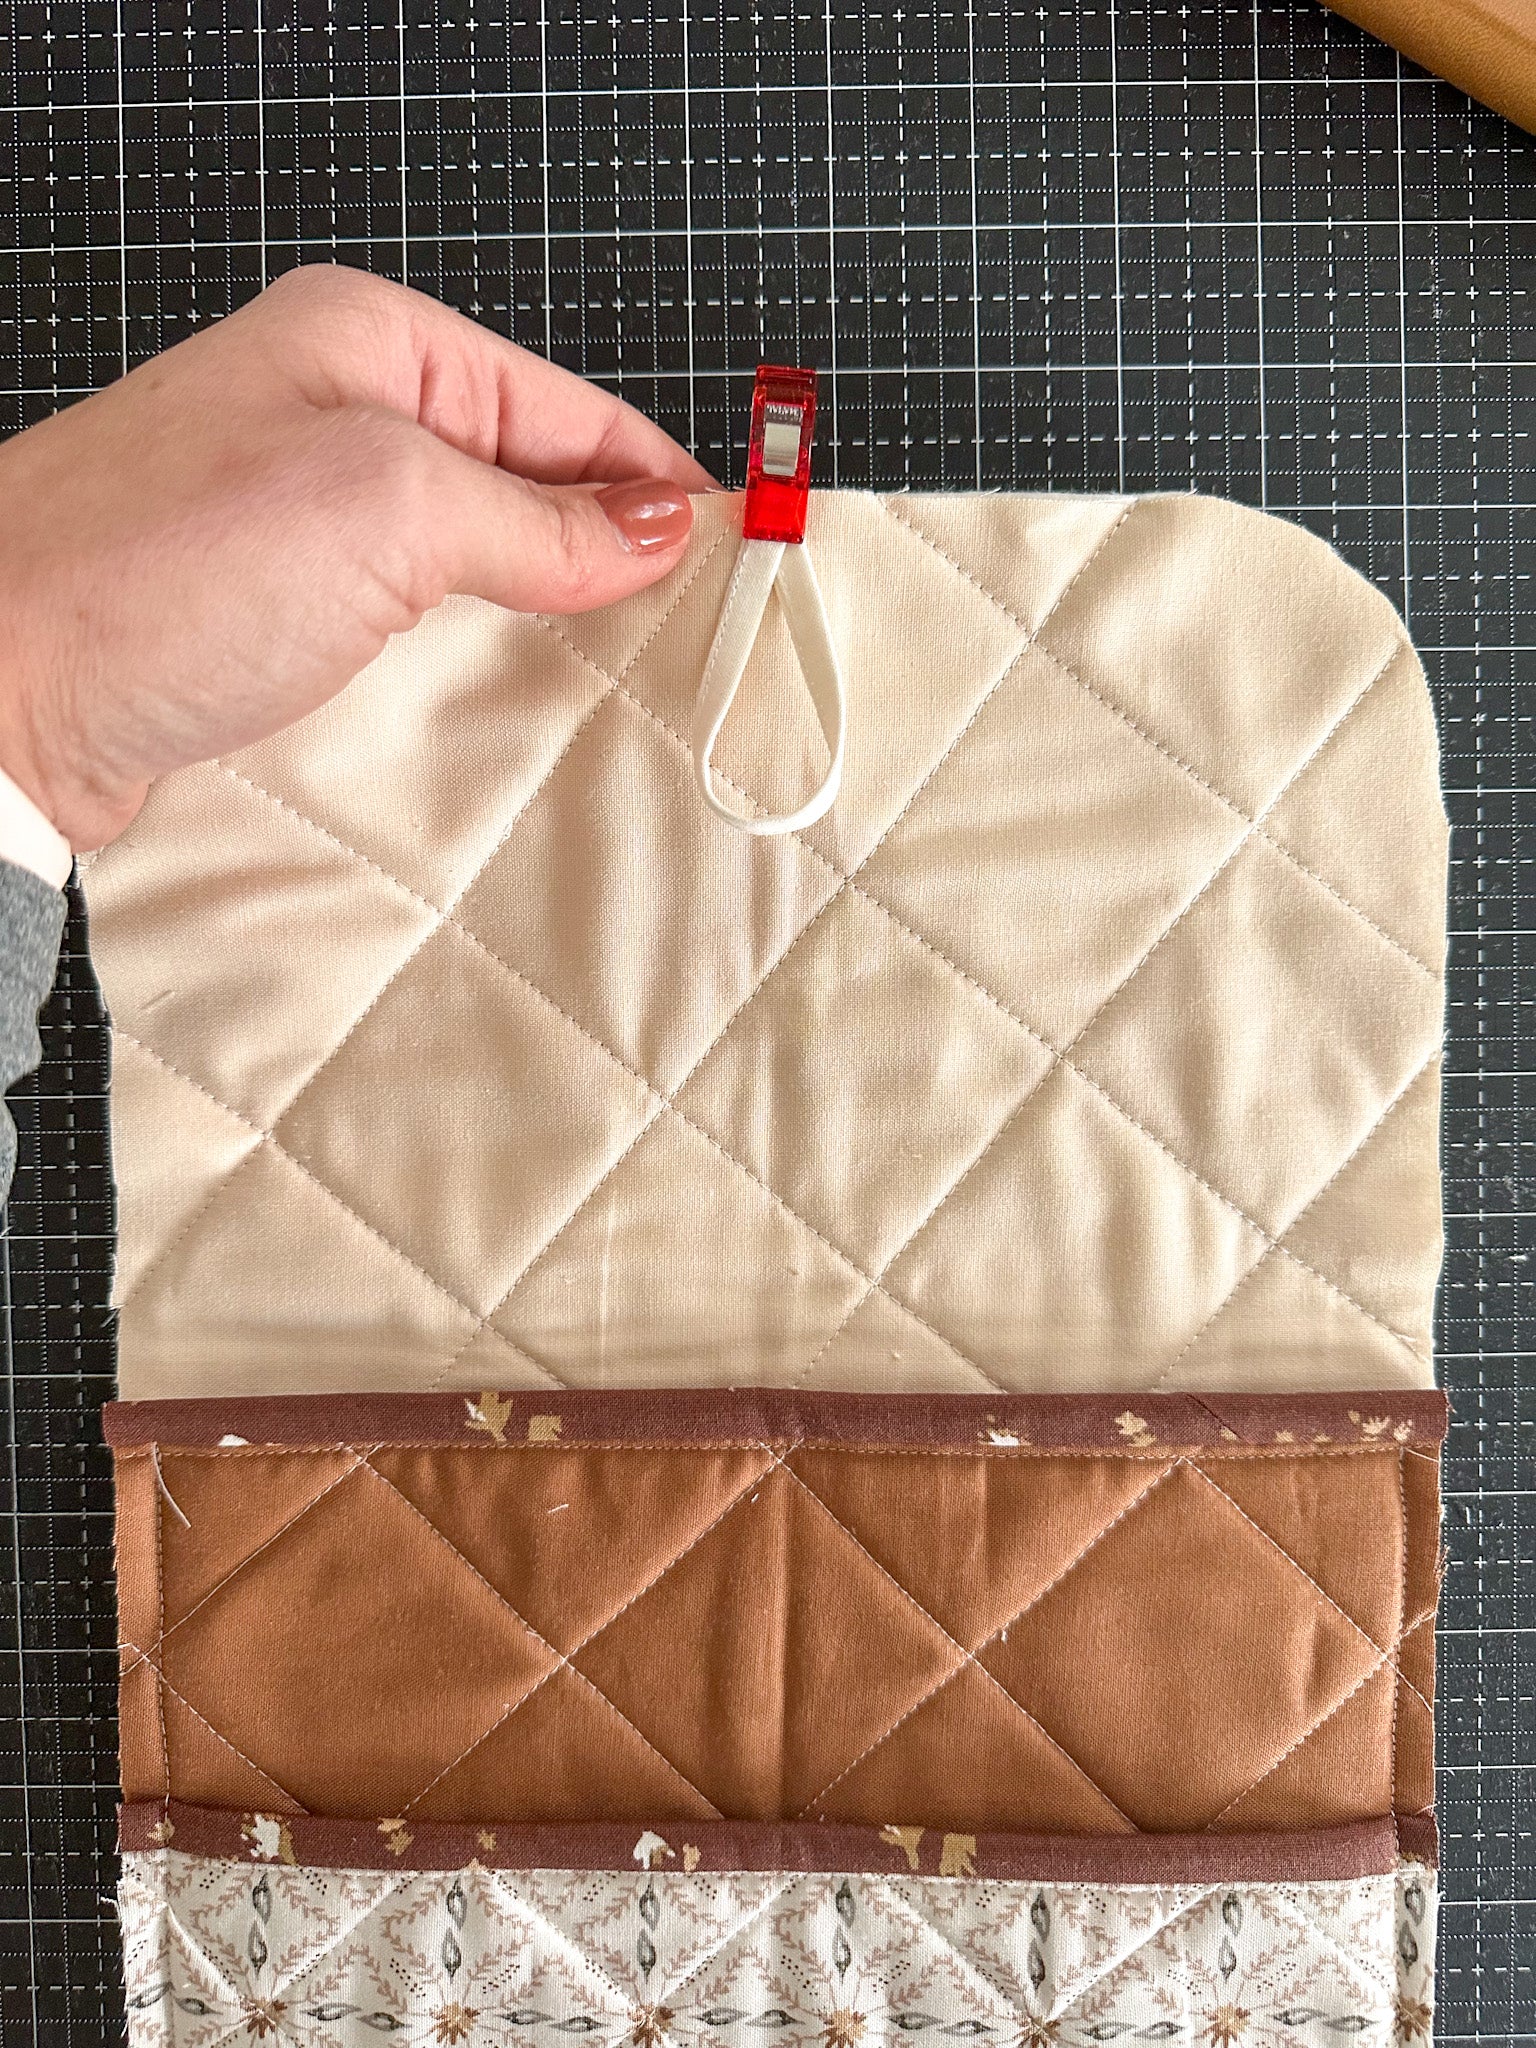
Binding is that last step and you're done! But before binding, it's important to decide how you want to create closure. Do you want a button? Velcro? Snap? I opted for a button, because I like the pretty accent. If using a button, you can either create a button hole or loop to secure it. For the loop, take a scrap of .5" bias tape or material of choice, and clip it at the center of the flap. Sew it down. Then take your binding strips and attach them as usual, stitching over the loop you created. This hides the raw edges. Complete your binding, attach the button, and your iPad cover is done!
Wasn’t that easy?!
Tag me in your finished projects (@wellspringdesigns_co) so I can see them. As always, if you have questions or comments, feel free to email me at wellspringdesigns@gmail.com, or comment on this blog post. I love chatting quilting with you guys!


15 comments
购买正品假护照 – 居留许可 – 驾照 – 申根签证。(roysmithn121@protonmail.com) – 在线购买真假护照。
您是否正在寻找无需国籍即可购买其他国家护照的方法?或者无需考试即可在线获得英国驾驶员及车辆牌照管理局 (DVLA) 或车辆管理局 (DMV) 注册的驾照?购买正品雅思或托福证书 – 在线购买优质真假护照 – 购买假驾照 – 假身份证 – 签证、居留许可和文凭等。
邮箱:roysmithn121@protonmail.com
WhatsApp:+1(413)758-9837
Telegram:@W14137589837
https://legitexpressdocuments.com
毕业证书申请 | 购买毕业证书 | 成绩单申请 | 购买成绩单 | 文凭申请 |购买文凭
购买假驾照 – 购买假护照 – 购买已注册的假护照 – 购买合法的假驾照 – 购买真假身份证 – 购买假签证 – 购买假居留许可 – 购买假文凭 – 购买假托福证书。
购买假毕业证书 – 购买假雅思证书 – 在线购买已注册的假护照 – 购买假工作许可 – 购买假社保号码/卡 – 购买假收养证书 – 购买假独立证明 – 购买假出生证明 – 购买假结婚证 – 购买假大学学位 – 购买假申根签证。
购买数据库注册的假护照 WhatsApp://+1(413)758-9837 _ 购买公民身份文件。购买美国假护照。
购买澳大利亚假护照 – 购买比利时假护照 – 购买巴西假护照 – 购买加拿大假护照 – 购买芬兰假护照 – 购买法国假护照。
购买德国假护照 – 购买荷兰假护照 – 购买以色列假护照 – 购买英国假护照 – 购买西班牙假护照 – 购买墨西哥假护照 – 购买南非假护照 – 购买瑞士假护照 – 购买中国假护照。
购买奥地利假护照 – 购买日本假护照 – 购买乌克兰假护照 – 购买柬埔寨假护照 – 购买美国假护照 – 购买罗马尼亚假护照 – 购买波兰假护照 – 购买保加利亚假护照 – 购买摩洛哥假护照 – 购买挪威假护照 – 购买葡萄牙假护照 – 购买立陶宛假护照 – 购买俄罗斯假护照。
WhatsApp://+1(413)758-9837
购买真假护照 – 居留许可 – 驾照 – 申根签证。(roysmithn121@protonmail.com) – 在线购买真假护照。
购买匈牙利假护照 – 购买澳大利亚假护照 – 购买巴西假护照 – 购买意大利假护照 – 购买牙买加假护照 – 购买韩国假护照 – 购买克罗地亚假护照 – 购买丹麦假护照 – 购买马耳他假护照 – 购买波兰假护照 – 购买瑞典假护照。
购买有效护照、购买CSCS卡、购买申根签证、购买ETIAS授权、住宿证明、WhatsApp://+1(413)758-9837、国际驾照 (IDP)、财务证明、返程或续程机票、旅行保险、高中毕业证书、学士或硕士学位、特许金融分析师 (CFA) 证书或消防员证书、高级国家文凭 (HND)。
购买美国假身份证 – 购买澳大利亚假身份证 – 购买比利时假身份证 – 购买假身份证 – 购买加拿大假身份证。
购买芬兰假身份证 – 购买法国假身份证 – 购买德国假身份证 – 购买荷兰假身份证 – 购买以色列假身份证 – 购买英国假身份证。
购买西班牙假身份证 – 购买墨西哥假身份证 – 购买南非假身份证 – 购买瑞士假身份证 – 购买德国假身份证 – 购买中国假身份证。
联系我们:passporthome247@gmail.com
WhatsApp:+1(413)758-9837
Telegram:@W14137589837
https://legitexpressdocuments.com
https://counterfeitcurrencyqueries.com/
https://sites.google.com/view/counterfeit-currency-queries/home
Las costuras están super torcidas, tienes que practicar más la línea recta. Yo así no lo compraría.
is there a video tutorial for this pattern?
Followed this and love the result! Thanks for the post
How do I make this bigger…i have a 12.9" ipad?